


This node allows you to use OpticStudio files (.zmx, .zos, .zar, .zprj) within an optiSLang workflow. When you open a file in the node, the parameters and results are displayed.
Setup
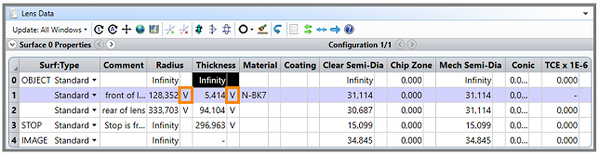
Parameters from OpticStudio simulation model that should be varied with optiSLang are recommended to be set to variable solve type. Parameters can be extracted from Lens Data Editor and Non-Sequential Component Editor (for sequential mode, non-sequential mode, and mixed mode).
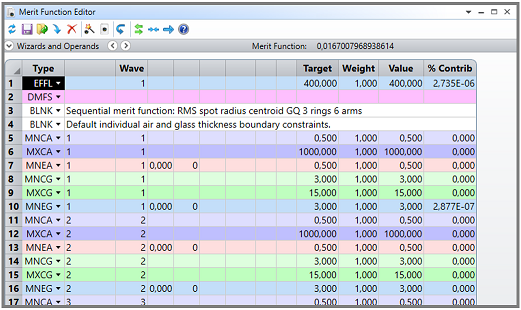
All simulation outputs to be processed in optiSLang must be defined in the Merit Function Editor. Only responses defined there can be used in optiSLang for further analysis.
The optiSLang Solver wizard extracts the parameters and responses after selecting the OpticStudio file (.zos/.zmx/.zar/.zprj).
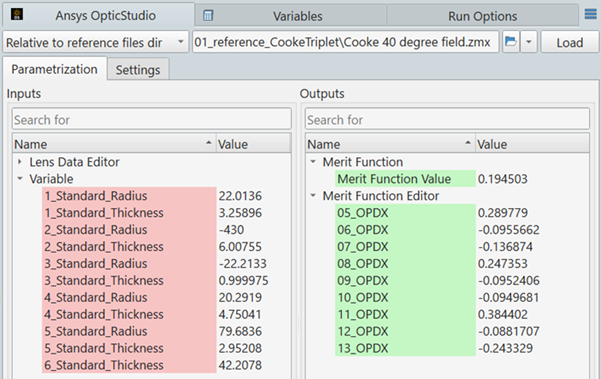
Parameters and Responses
The Customization: Customized integrations use tree view setting controls whether the parameters and responses are presented as list or tree structure. You can change it in the optiSLang Settings dialog box. After changing the setting, restart optiSLang.
When connecting to an OpticStudio project, optiSLang automatically recognizes the mode (sequential, non-sequential, or mixed mode) and provides access to the content of the corresponding predefined editors.
For pure sequential mode, inputs from Lens Data Editor are extracted to be selected as parameters.
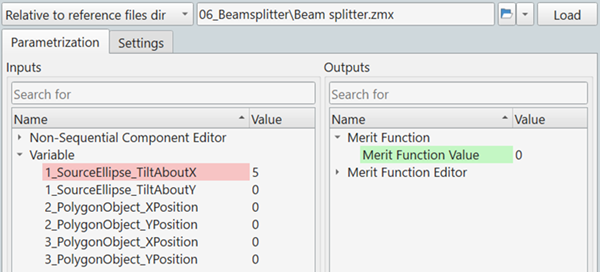
For non-sequential mode, the inputs from Non-Sequential Component Editor are extracted.
In case of mixed mode (sequential mode containing non-sequential components), both Editors are listed.
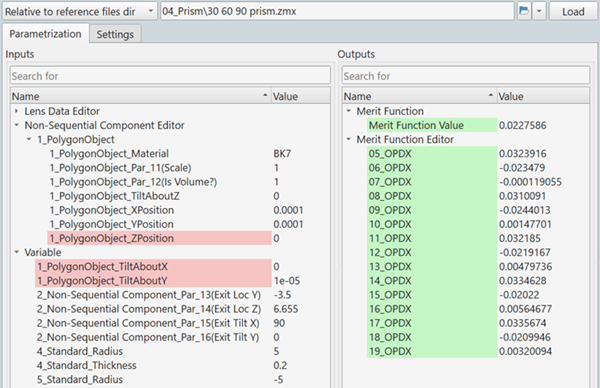
Variables that are already defined as variable solve type are listed separately.
In all modes, the Merit Function Editor, including the Merit Function Value itself, is available to select outputs as responses. All inputs and outputs can be registered using drag-and-drop.
Settings
The node provides two settings tabs: General and Export.
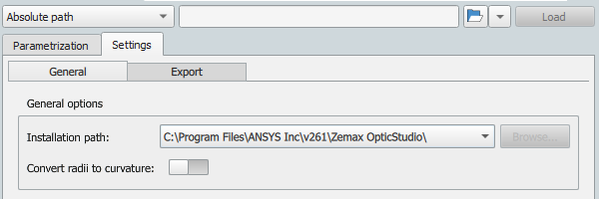
The General tab provides setting of the installation path. When the integration is used for the first time, the local OpticStudio installation paths will be automatically localized utilizing "AWP_ROOT" environmental variables and registry values. You are also able to manually enter a path pointing to the folder of the OpticStudio installation by selecting Select custom solver path and then choosing OpticStudio folder in the invoked file explorer via button (for example, C:\Program Files\ANSYS Inc\v261\Zemax OpticStudio).

The second general option is conversion of radii to curvature to, for example, enable lens shape variation from concave to convex or vice versa. To trigger the conversion, press the button to save the setting and then the button to reload the project.
The Export tab offers various export options, the first group for images and the second group for raw data. Note that the raw data results to be exported must already be defined in the reference project.

Run Options
This node has general Run Options. The number of supported options is individual for each node.
Below "Execution", the numbers for maximum simultaneous executions and for Designs per execution can be defined.
Tutorial Examples and Support
For tutorials or examples, visit the Ansys Learning Hub or the Application Gallery.
For further questions, submit a support case via our Customer Support System.
Versions and Requirements
Operating Systems
Windows.
Versions
See the Supported Integration Versions table.
Ansys Zemax OpticStudio (AZOS) is supported.
Troubleshooting
Linux is currently not supported.