


The Material Storage is a complete application that runs within Rocky and enables you to access and interact with a material repository.
The material repository can be the Ansys Granta or a local repository on your machine. The local repository is a database that the Material Storage can create and access.
The Material Storage was built to facilitate three common situations related to the calibration procedure:
Get previously calibrated material and use it for a new setup
Save a new calibrated material into the database for later use
Remove specific information from the database that was saved incorrectly or is outdated
Data visualization is available within the wizard, enabling users to open all information related to the entities.
Also, there are review capabilities to select and even rename entities.
The Material Storage can handle STL files for custom particles, like Custom Polyhedron or Custom Shell. However, when you load the STL into the particle, you should select the default scale in ‘m’.
This script does not support handling flexible and breakable particles.
This wizard sript menu has a few options. Currently, there are menus for File, Options, and Help, which are shown in the figures below:
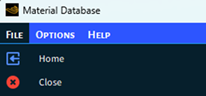
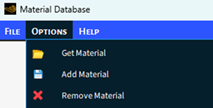

Table 4.1: Menu options
| Menu | Options | Description |
|---|---|---|
| File | Home | This button resets the wizard. |
| Close | This button closes the wizard. | |
| Options | Get Material | This button accesses information from the database and imports it into Rocky. |
| Add Material | This button accesses information from Rocky and exports it to the database. | |
| Remove Material | This button removes information from the database. | |
| Help | Manual | This button opens the manual. |
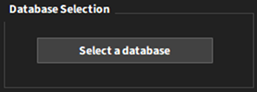
The home user interface provides the definition of the database to be used and the ways you can interact with it.
The Select a database button opens a new dialog box to define the database.
The Material Storage wizard enables users to connect to an Ansys Granta server or to use a local repository. In case you choose a local repository, you need to define the folder location on your machine where the wizard can locate the local repository.
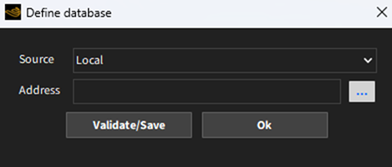
Table 4.2: Options for the Define database dialog
| Options | Description | Range |
|---|---|---|
| Source | This field defines the type of database accessed. | Local, Ansys Granta |
| Address | This field defines the location address of the database. | Path |
Note: In case you do not have a local repository, you can select an empty folder and press Validate/Save button on the Define database dialog. Then, the wizard will ask permission to create a local database file.
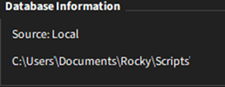
Database Information box shows the type of database and where it is currently used.

Material Options box has the three ways you can interact with the database, which are the same options available on the Option menu:
Table 4.3: Material Options
| Options | Description |
|---|---|
| Get Material | This button accesses information from the database and imports it into Rocky. |
| Add Material | This button accesses information from Rocky and exports it to the database. |
| Remove Material | This button removes information from the database. |
All three options to interact with the database lead to a similar user interface. The window structure is shown below:
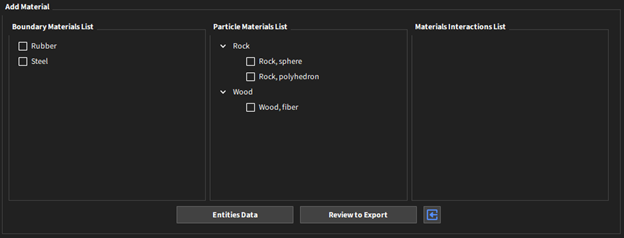
Regardless of the selected option (Get Material, Add Material, or Remove Material), you will visualize the same entities panel. This panel shows the Materials and Materials Interactions available in the source (the source depends on the selection and can be the database or Rocky):
Boundary Materials List: Details all the available materials for boundaries.
Particle Materials List: Details which particles are available. The particles are sorted by materials.
Materials Interactions List: Shows the available interactions between the selected materials for boundaries and particles
Note: You can access this tool by right-clicking the desired entity and selecting Entity Data. You can also open the same panel by double-clicking the desired entity.
This section of the user interface also has three buttons:
Entities Data: This button opens a new dialog to show data visualization of all selected entities.
Review to Export: This button opens a new dialog to review the selected entities and then proceed with the expected function.
Note: This button changes depending on the option you have previously selected. If you selected Get Material, you will see Review to Import, if you selected Remove Material, you will see Review to Remove.
Home: This button resets the wizard.
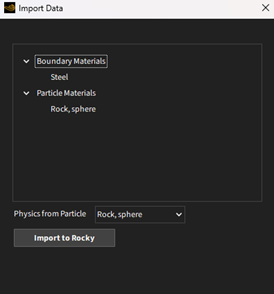
In case you choose the Get Material option, the Review to Import button opens the Import Data dialog. In this dialog, you will view all entities selected. Besides that, if you have more than one particle selected, you need to specify which Particle will be used to import models. After review, clicking the “Import to Rocky” button will bring all material information into the Rocky setup.
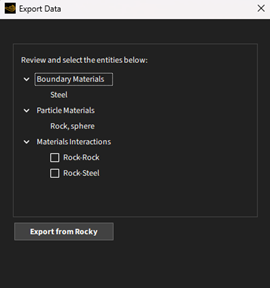
In case you choose the Add Material option, the Review to Export button opens the Export Data dialog. In this dialog, you will view all selected entities. Also, you need to double-check which materials interactions you want to export. After reviewing it you can click on the Export from Rocky button to send all material information to the database.
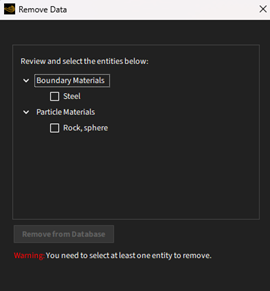
In case you choose the Remove Material option, the Review to Remove button opens the Remove Data dialog. In this dialog, you will view all entities selected. And you need to double-check which materials you want to remove. After review, clicking on the Remove from Database button removes all material information from the database.
Note: The dialogs for review (except the Remove panel) have additional rename tools. You can double-click on the Boundary or Particle material name and then rename the entity.
Download the Material Storage zip and extract all files. Copy both the script_material_database.py script and the script_material_database.py.files folder to the %HOMEPATH%/Documents/Rocky/Scripts.
From the PrePost script panel, launch the Material Storage by clicking its Play script button.
From the Material Storage home user interface, define the database you intend to use.
Tip: Check your database information in the “Database Information” box.
Select the option you intend to interact with the database (Get Material, Add Material, or Remove Material)
Select the desired materials, then go ahead with the review and execute the function according to the selected option. According to the selected option, you will have:
Get Material: The entities will be created and defined within your Rocky
Add Material: The entities will be created and defined within your database. You will be able to access this information later.
Remove Material: The entities will be removed from the database.