


Recording Blocks
The Block Recording feature enables you to use SpaceClaim to record and play back operations.
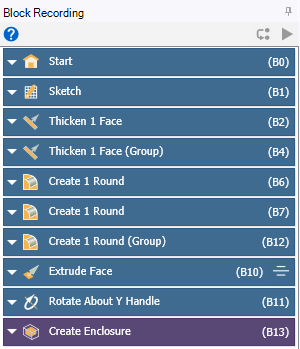
You can import models with existing parameters. You can also create 2D sketches of lines, arcs, and splines and convert them into 3D models. Block Recording captures all the changes you make to your model in blocks of script. As you perform operations, they are recorded in script blocks. Each block represents a block-of-script that can be used to recreate that part of the model design.
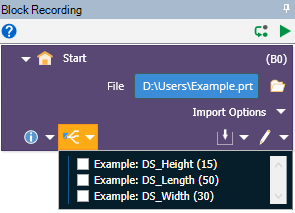
If you import the CAD model with existing parameters via the associative interfaces, the Start block captures the import of the model, along with the Import Options used. Parameters set up in your source CAD system are also available.
the specified file path
the same directory as the *.scdoc file
the import_files folder
This folder can be used to archive files external to the working project folder when using Ansys Workbench. When the Imported files external to project directory option is selected while archiving a Workbench project, the external files in the project are copied to the import_files folder and then archived with altered file paths in the Workbench project.
Hovering over a block shows a preview of the operation.
An example of a block for the Extrude Face operation is shown:
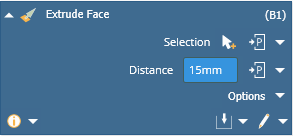
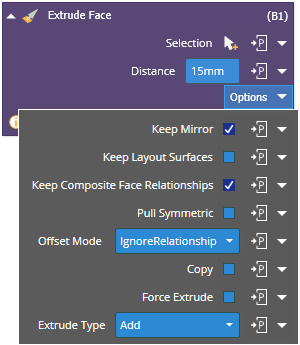
View and edit the options for the operation by clicking the Options drop-down.
Click
 to create a variable for
the selection. You can also expand the drop-down and select Create
Variable to set a variable.
to create a variable for
the selection. You can also expand the drop-down and select Create
Variable to set a variable. 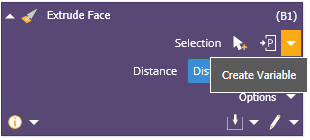
Click
to create a parameter.
You can also expand the drop-down and select Create Variable or
Add Parameter to create a variable or add an existing
parameter.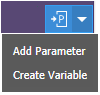 Note: Block recording tracks model history and should not be used with Group parameters, which are intended to be used with direct modeling. Either block recording parameters or group parameters will be published to Workbench if connecting SpaceClaim to other applications.
Each parameter has a unique label and is added to the Parameters list.
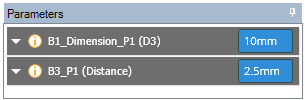
You can use the parameters to define other variables using basic mathematic expressions.
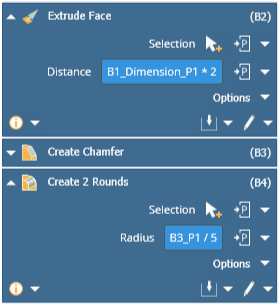 Note: When working with expressions, you must be careful with units.
Create output parameters by clicking the Output Parameters
 drop-down.
For example, you can create a parameter for the bodies, edges, or faces created by clicking the
 icon next to the appropriate
selection.
icon next to the appropriate
selection.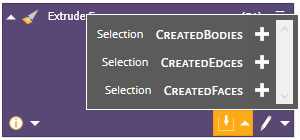
You can also choose from the Convert, Filter, and Properties methods available. For example, you can convert selections to types (such as faces or edges), or convert by shape, size, etc. You can choose to filter faces, edges, parts, bodies, or components or select based on properties such as plane, normal, smart variables, area, perimeter, etc. Click the
icon
next to the appropriate selection.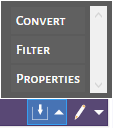
Click Edit Script
 to view and edit the block snippet
in the Script Editor.
to view and edit the block snippet
in the Script Editor.
You can insert a code snippet or a selection snippet, step through or debug the script, and cancel or accept your script changes.
Refer to Scripting for detailed descriptions of the Script Editor functions.
Edit block properties for changing dimensions, options, etc. Individual parameters can be changed in each script block and applied to the overall design of the model. Once you rerun Block Recording, the model is updated with the new parameters, options, etc.
When you edit a block, the blocks that require updates will be indicated by  .
.
The direct modeling operations can be replayed, similar to recording and replaying a script in SpaceClaim.
Click Next Feature
 to move to the next feature
block.
to move to the next feature
block.Click Continue
 to move to the end feature block.
You can also work with the script blocks to:
Move to the state defined by a specific block - Right-click a block and select Move to from the menu.
Force Regenerate the selected block - Right-click a block and select Force Regenerate from the menu.
Delete the selected block - Right-click a block and select Delete from the menu.
Cut the selected blocks and paste them below the selected block - Right-click a block and select Cut from the menu. Next, right-click the appropriate block and select Paste Below to insert the cut block.
Insert blocks - Right-click a block and select Insert Custom Block from the menu.
Suppress the selected feature state - Right-click a block and select Suppress from the menu.
Group blocks to combine operations - Select the blocks to be grouped, right-click and select Group from the menu.
Hide non-model changing blocks - Right-click a block and select Hide Non-Model Changing Blocks to hide non-model changing blocks, for example changing the visibility of objects. This option is enabled by default.
Collapse all blocks - Right-click a block and select Collapse All from the menu.