


Shelling and Adding Infill Using Custom Shapes
You can also use Custom shapes for the Infill. In the examples below, the "X" shape will be used as a Custom Infill.
The images below show some examples.
|
The "X" shape in the lower left corner is chosen as the custom infill. Scaled to fit is used with a larger dimension to create a larger space between shapes. Fill Shape was chosen to fill the custom shape and leave a void between shapes. |
 |
|
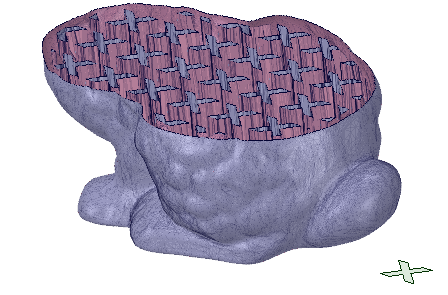
The "X" shape in the lower left corner is chosen as the custom infill. Scaled to fit is NOT used so the shape is applied as-is, which creates and a smaller space between shapes. Fill Shape was chosen to fill the custom shape and leave a void between shapes. |
 |