


The File menu option allows you to execute a macro.
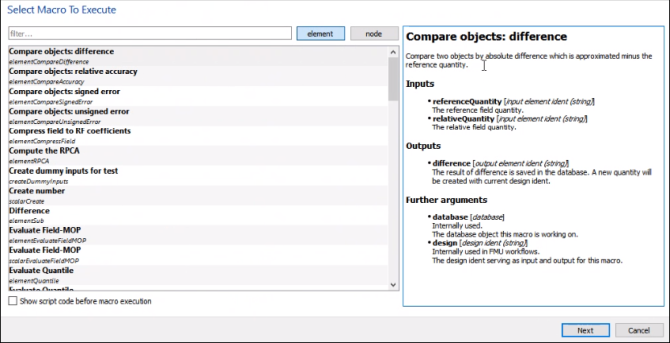
In the pane on the left, you have a filter option for limiting the macros that are shown and and buttons for specifying the type of data on which to execute the macro. oSP3D is generally able to determine which button is applicable to a macro based on the data in the oSP3D database file. However, if the file contains both element data and node data on which the macro can be executed, both buttons are available. At the bottom of the left pane, the Show script code before macro execution check box provides for seeing the function calls that are made in the script code as you proceed through the wizard pages.
In the pane on the right, you have a description of the selected macro and information about the inputs, outputs, and arguments.
Once you complete the first page and click , the second page provides for selecting the designs on which to execute the macro and the fields to use as the inputs. If you did not select the Show script code before macro execution check box on the first page, the second page displays a button so that you can then execute the macro. If you did select this check box, the second page displays a button that then takes you to a third page where you can view and edit the script code before clicking to execute the macro.
Note: Using this wizard, you can execute all macros available for FMU export, allowing you to test FMU-exported macro workflows. For more information, see Exporting a Macro-Based FMU 2.0 Archive File.