This example describes when the files that are generated and used by Fluent Meshing are written and how the cell states change as you work with a Fluent (with Fluent Meshing) component system in Workbench.
Add a new Fluent (with Fluent Meshing) component system to the Project Schematic.
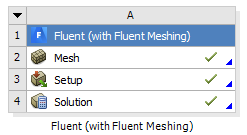
The state of the Mesh cell is Attention Required and the states for the Setup, and Solution cells are Unfulfilled.
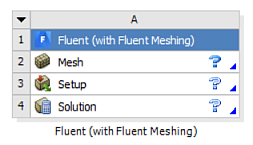
Double-click the Mesh cell. The Fluent Meshing application launches (the option is automatically enabled in Fluent Launcher). In the Fluent Meshing application, import a geometry and/or create a mesh file, then perform your mesh operations. You can also import a Fluent case file into the Fluent Meshing application.
Switch to the solver (solution) mode (by using the button in the Solution group box of the ribbon, or by using the
switch-to-meshing-mode.msh.h5) and the settings (.set) files are written.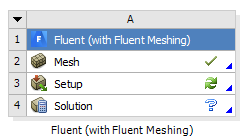
In Fluent, specify boundary conditions, initialize the solution, and enter a nonzero number of iterations on the Run Calculation task page. The state of the Setup cell becomes Up-to-Date, and the state of the Solution cell becomes Refresh Required.
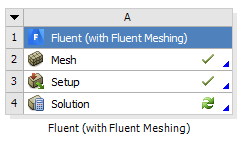
Start the simulation in Fluent by clicking on the Run Calculation task page. The settings (
.set) file is written and iterations begin. The state of the Solution cell becomes Update Required.
When iterations are completed, or the solution meets the convergence criteria, the state of the Solution cell becomes Up-to-Date.