


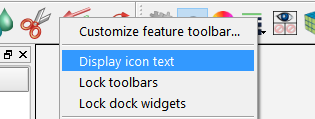
To turn on Icon text:
Right click in the Feature Icon Bar then select from the pulldown.
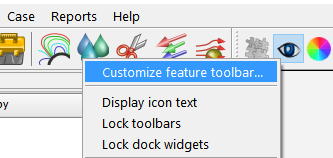
To customize the Feature Icon Bar:
Right click in the Feature Icon Bar then select Customize Feature Toolbar from the pulldown.
In the resulting dialog you can:
Select features from the available list on the left and use the right arrow button to place it on the Feature Icon Bar.
Similar, if you select a feature in the right column you can click the left mouse button which will remove it from the Feature Icon Bar.
Any feature in the right column can be moved up and down to modify its order on the icon bar via use of the up/down arrows.
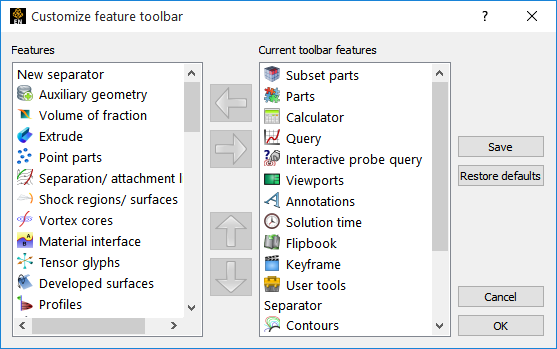
The button will retain the settings next time you run EnSight.
While the button will make the modifications for the current session only.
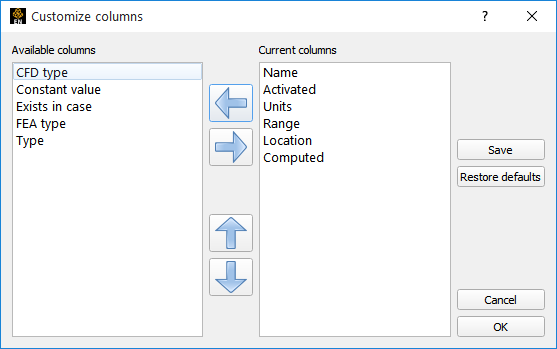
To customize the columns in the list panels:
Right click on the column header in the list you wish to customize. In the figure shown the right click was performed on the Name portion of the list.
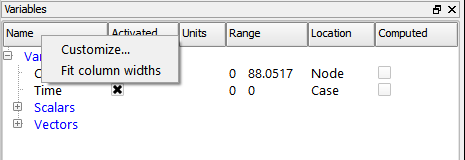
Each list panel will have a different set of that can be shown. The figure at right shows the choices for the Variables list. Similar to the Feature Bar discussion above you can add or remove new columns and modify the order of the columns using the left/right and up/down arrows.
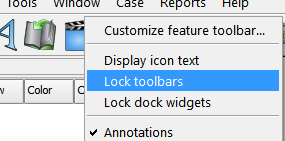
To move the Icon bars:
Right click on any icon bar. In the resulting pulldown the Lock toolbars should be unchecked, that is, toolbars are allowed to be moved.
The icon bars have a handle. Click and drag the handle and the icon bar will come out of the user interface and will follow the mouse as you move it.
If you release the mouse button outside of the user interface the icon bar will be free floating.
OR

As you drag the icon bar to the various docking locations in the user interface you will see a space open up where the bar could dock itself. Release the mouse button and the icon bar will doc in the space provided.
The blue rectangle indicates where the bar could be docked.

This bar is being dragged.

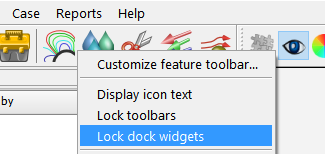
To move the panels:
Right click on any icon bar or the header of any panel. In the resulting pulldown the should be unchecked, that is, widgets are allowed to be moved.
The panels can be dragged by their header. Click and drag the header and the panel will come out of the user interface and will follow the mouse as you move it.
If you release the mouse button outside of the user interface the panel will be free floating.
OR
The blue rectangle indicates where the panel could be docked while the Parts panel is being dragged.
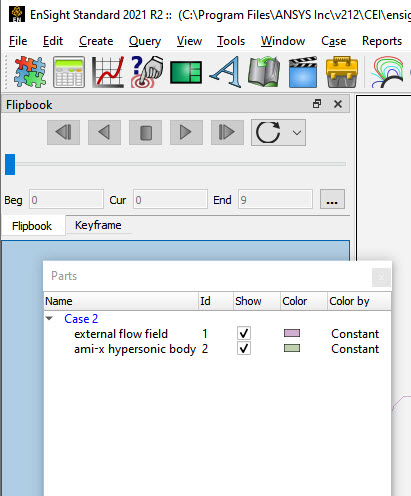
As you drag the panel to the various docking locations in the user interface you will see a space open up where the panel could dock itself. Release the mouse button and the panel will doc in the space provided.
Panels can be stacked on top of each other. In which case you will get a tab for each panel occupying the same space. By default for example, the Variables, Plots/Queries, Annotations, and Viewports panels are stacked.