


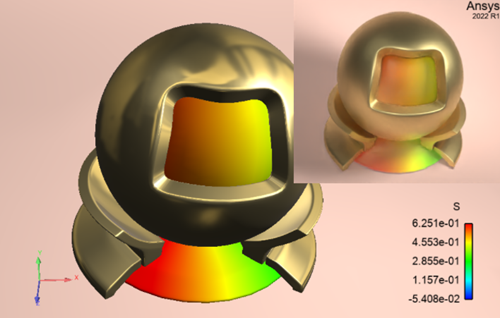
In many situations, the images generated from raytracing are different from the 3D graphics window. To make it easier to reach the desired results, we have created a mechanism so that the user can preview the raytracing results easily. Our approach uses a logo image to display the raytracing result in realtime. The logo image is a 2D overlay on the 3D rendering window. Once created, the preview image will be updated automatically when the camera position of the primary viewport (viewport 0), surface material property, part visibility, etc., changes. For performance reasons, only one preview logo image is allowed in the scene.
There are several approaches to turn on the preview.
From the Create/edit annotation (logos) dialog. Click on the following icon
 within EnSight’s toolbar to open the annotation dialog, shown
below. Once the dialog in open, switch to the logo tab, where you will see a “Show
raytraced image” option. Once checked, when creating a logo image, the image source
will be from the raytracing renderer, not a file anymore. You can turn off displaying the
preview by unchecking the visibility of the logo image. To resize the preview image, click on
the logo image, then drag the handle on the upper right corner of the logo image. Finally,
once finished, it is suggested to delete the logo image to free the resources used by
raytracing.
within EnSight’s toolbar to open the annotation dialog, shown
below. Once the dialog in open, switch to the logo tab, where you will see a “Show
raytraced image” option. Once checked, when creating a logo image, the image source
will be from the raytracing renderer, not a file anymore. You can turn off displaying the
preview by unchecking the visibility of the logo image. To resize the preview image, click on
the logo image, then drag the handle on the upper right corner of the logo image. Finally,
once finished, it is suggested to delete the logo image to free the resources used by
raytracing.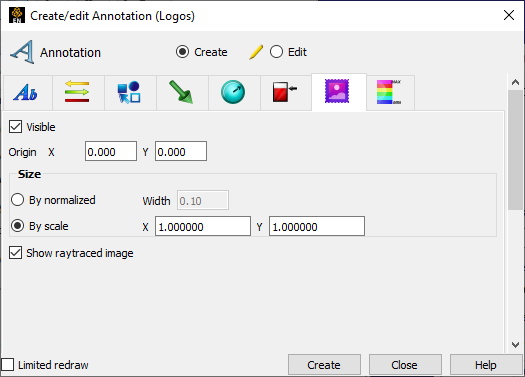
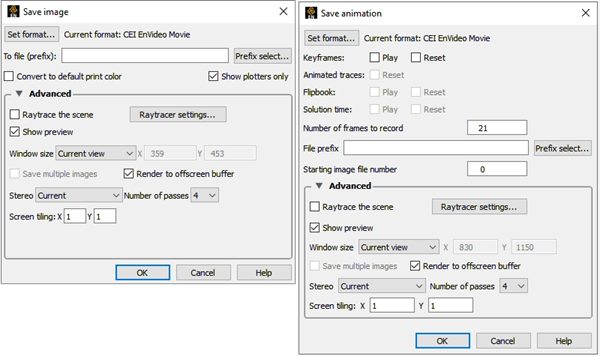
Use the Save Image or Save animation dialog. For both dialogs, under Advanced, there is an option to which displays the previewed image.
Select the → menu.