


Shelling and Adding Infill Using Basic Shapes
Printing the model could take a long time and a lot of material, if the entire volume is filled.
Infill lets you shell the interior of a model and add an internal support structure. This provides strength while reducing material costs and printing time.
The tool has several options for controlling the size, shape and percentage of the volume filled.
To shell by adding an infill using basic shapes:
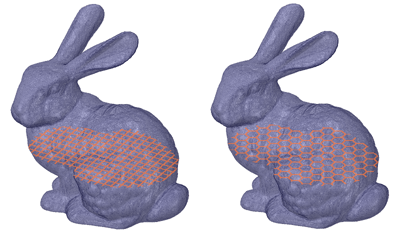
The images below show preview for Square and Hex Infill shapes.
The Y-axis is chosen for the preview Direction and the Offset was adjusted to
place the preview near the middle of the model along the Y-axis.
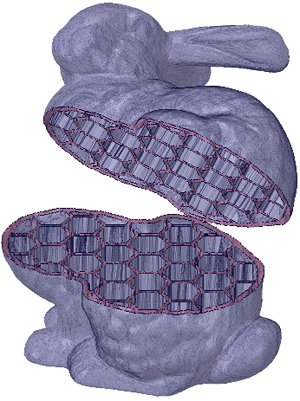
The image below shows the model shelled with a Hex
infill. The body was split and moved to expose the Infill.
The image below shows the model shelled with a 3D
lattice infill.

Note: Lattice infills are sensitive to the coarseness of the
faceting. Coarse facets produce lattice infills faster. Coarseness is controlled
when you convert a solid body to a faceted body using the
Convert tool. When converting, use a Maximum Angle in the
neighborhood of 30° to get fewer facets and speed up the lattice
calculations.