


Shrinkwrap Examples
Using the Select Tight-Fit Faces or Facets Tool Guide
Use the Select Tight-Fit Faces or Facets tool guide to control shrinkwrap facets in selected areas.
The following simple example shows how the tool guide works.
|
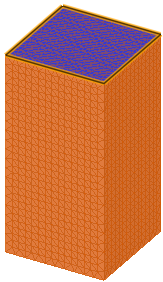
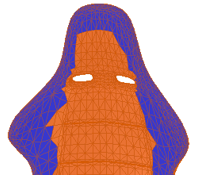
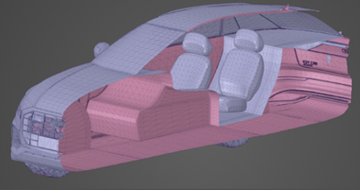
Click the Select Tight-Fit Faces or
Facets tool guide and double-click the
top face. This face will be tightly fit in the
shrinkwrap.
|
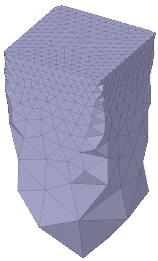
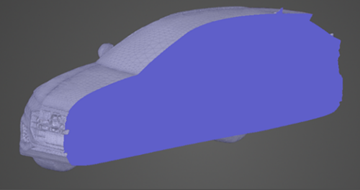
Notice that the facets fit tightly on the selected
face. It is important to note that the controlling
effect falls off as a function of distance from the
selected area.
|
Using a Secondary Facet Size
Secondary size is more useful for refining the shrinkwrap to preserve the initial shape. An example is shown below.
| This faceted model has a distinct profile shape. | 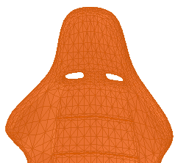 |
| Using the default size and no Secondary size specified, Shrinkwrap produces a very rough approximation of the profile. | 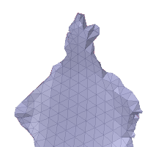 |
|
 |
| Click Complete and see that the secondary size follows the profile. | 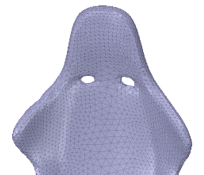 |
Using Shrinkwrap for Curvature Dependent Faceting
Use the Shrinkwrap options to make the triangles conform more to the shape with different sized triangles based on curvature.
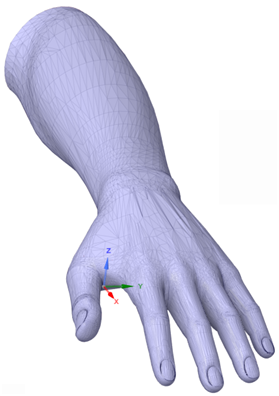
Original faceting.
 |
Faceting after shrinkwrap using Max
size and Curvature
angle. Larger triangles can be seen on the
forearm and smaller triangles by the nails where
curvature is greater.
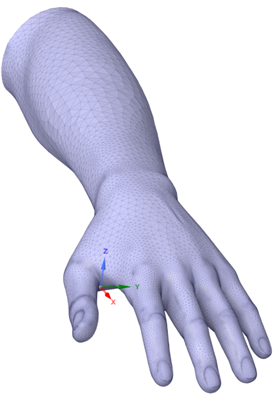
|
Using the Remove Interior Option
Use the Remove interior option to wrap the selected object to cover all openings and remove interior voids.
|
This example has both small details that should be
captured during shrinkwrapping as well as large
openings.
|
Faceting after shrinkwrap using Remove
interior with a Fit
tolerance of zero. Specifying a value of
zero will automatically compute facet sizes based on
geometry.
|