


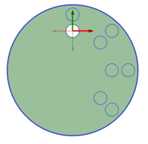
Creating a One- or Two-dimensional Circular Pattern
- Select the Create Pattern tool guide, or press Enter, to
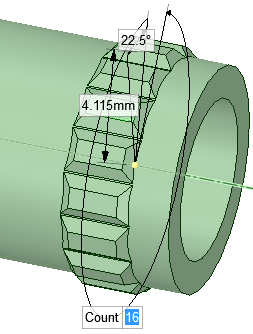
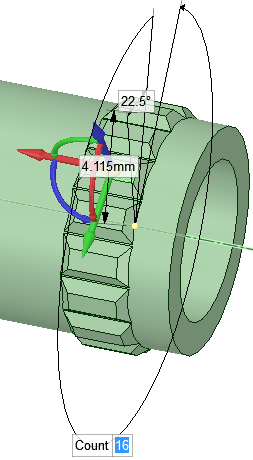
complete the pattern.When the pattern is previewed, any members which cannot be created are shown in red. Members that can be created are shown in blue.The image below shows the preview for a two-dimensional pattern. For one-dimensional, only the Angular direction is displayed. Clicking the arrows flips their direction 180-degrees. You can create circular patterns on cylindrical faces, both around the face and along the axis.
In Discovery, any pattern member can be used to modify the pattern after you create it. If the change cannot be made to all pattern members, the member that cannot change is still part of the pattern.
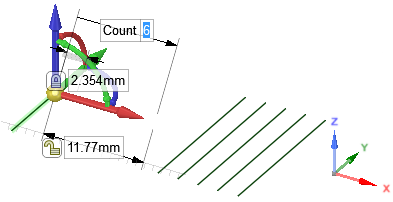
When you select a member of a pattern, you will see fields for the pattern count and distances relative to the member you have selected. Press Tab to move among the dimension and count fields.
Icons next to the pattern's dimensions and counts show which will be changed if you change the value of the highlighted field. The closed lock indicates that a dimension won't change and the open lock shows you it will change. You can override a lock on a dimension by clicking its icon to toggle it between locked and unlocked.
Dimension or count line placement, arrows, and value fields show you how the pattern will change if you change the value of a field.
Your selection determines how changes to the distance and count affect the pattern's position. If you select one member of the pattern, the change is centered on that member. If you select all pattern members, the change is centered on the entire pattern, with the distance between members locked by default. You can control which direction the pattern will grow based on which member you select and which count or distance you change.
Changing a pattern count in one direction does not change the distance between pattern members. Instead, the overall distance of the pattern will change. This is indicated by the closed lock icon.
Circular patterns are anchored at the opposite end by default when you move one end.
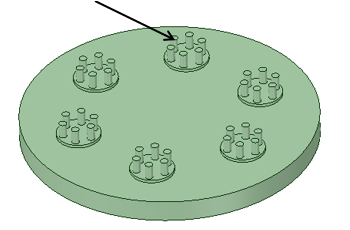
- In patterns of patterns, associations of children of the first pattern are
maintained. An example is shown below. The height of all the bosses is changed
by changing one. You can do this by using the Move tool
to pull up, adjusting the height.
-
Patterned curves can now be moved. Previously, you could
move one of the members and the rest would not follow. The example on the right
shows the previous behavior. The line on the left was used to create a six
member pattern. When the line is later moved, the other members do not
follow.
- Pattern dimension display now remains when you enter the Move tool. Previously, the pattern dimensions disappeared and only the faces were displayed. This led to confusion about what was selected for the Move. The images below show the new, correct behavior.
 |
 |