Moving Solids/Surfaces with the Select Tool Examples
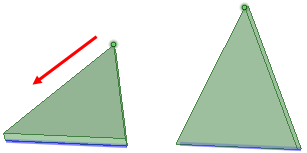
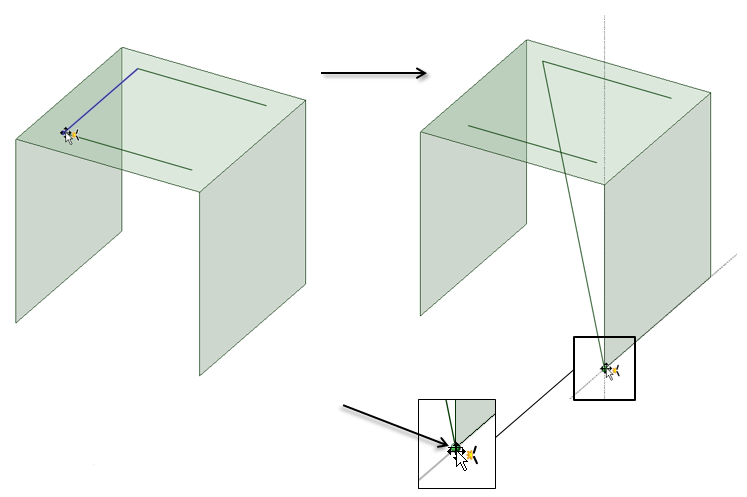
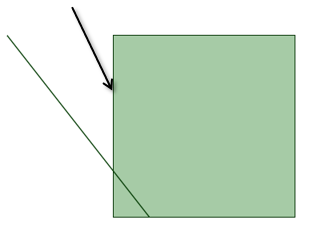
The blue edge was selected using the Alt key, then the green vertex was
dragged in the direction of the arrow. The part pivots around the blue
edge.
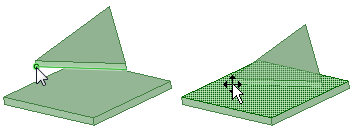
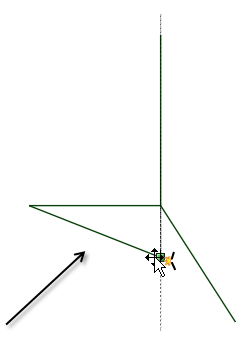
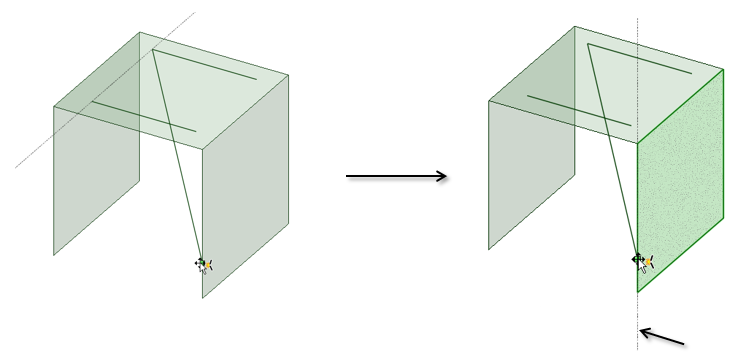
The vertex highlighted in green was dragged down until the face shown on the
right was highlighted. The triangular part moves down so the vertex is in the
same plane as the face.
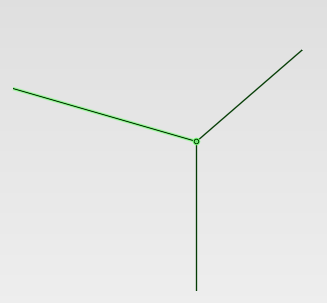
When you hover and pre-highlight a vertex, the curve to which it belongs is
highlighted. Using the mouse wheel, you can scroll through other curves attached to
the vertex.
The cursor changes to the Move cursor when the mouse is over a vertex.
When the curve you want is highlighted, you can Alt-drag to move only the vertex of
that curve.
Pressing the Alt key changes the Move cursor to the Detach-and-Move cursor.
You do not need to hold the Alt key throughout dragging. You can release it once you
start dragging.
Drag a copy of the curve using Ctrl+Alt+drag.
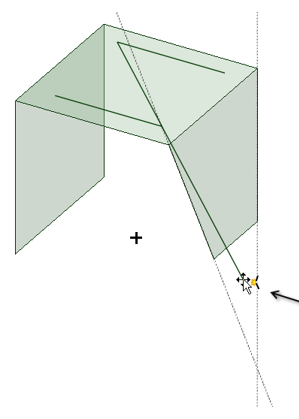
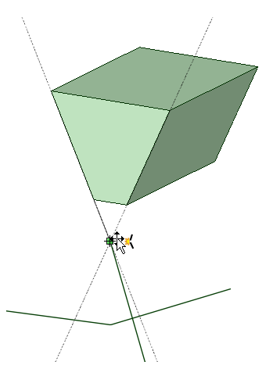
In the images above, notice the "source-generated dotted lines" extending from the
other curve. This is similar to the behavior in Sketch Mode for aligning and
snapping the vertex. By default, the system generates them extending from all curves
that intersect at the selected-and-moving vertex.
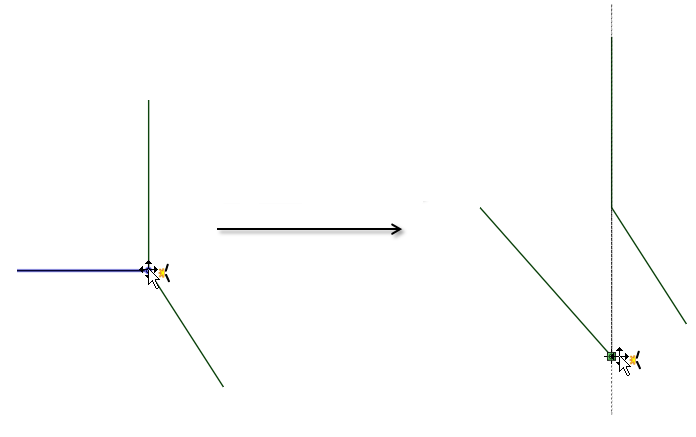
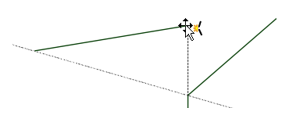
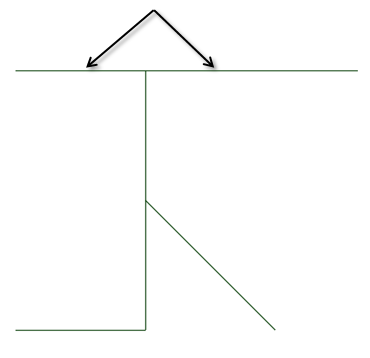
Drag the vertex vertically. The extension line for the affected curve is shown
as well as the extension for the vertical curve.
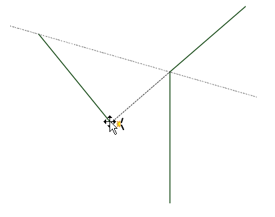
Drag the vertex away from the vertical curve. The vertical extension line
disappears, the affected curve extension stays and the extension for the third
curve appears.
Sketch only allows snapping in the plane, but with Curve Dragging, you can
snap in 3D.
When you hover over any straight line or edge while dragging a vertex, a dotted
vector will be generated. This allows you to snap to the extension of any existing
line or edge.
Since you can drag a vertex without holding down the Alt or Ctrl keys, you can
Shift-hover over other objects. This displays extension lines for other lines or
edges. The default, source-generated dotted lines are erased when you
Shift-hover over an object.
Sequentially Shift-hovering on converging lines or edges lets you snap to
their virtual intersection.
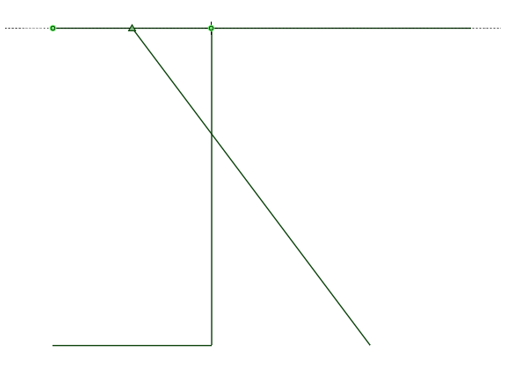
In the example below, the top horizontal line is a single curve, but with two
"sub-curves" because the vertical curve's endpoint lies somewhere along its
length. Although there is only one horizontal curve, it can be treated as split,
for the purposes of dragging other vertices to these sub-curve endpoints or
midpoints.
Sub-curve midpoints are available for snapping if you Shift-hover over the parent
curve.
Green points display at the endpoints of the sub-curve and a triangle displays
at the midpoint. This helps to determine what portion of the curve is being
snapped to, in cases where it may be ambiguous.
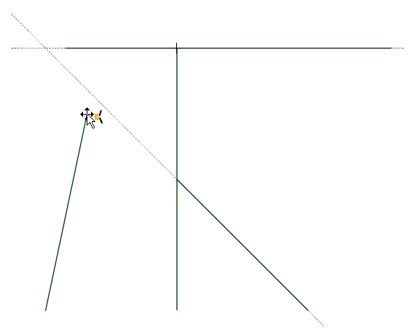
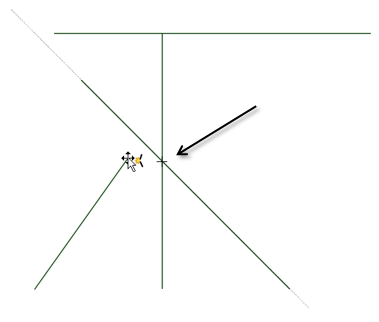
The virtual intersection of the horizontal and slanted lines is available for
snapping if you Shift-hover over both.
Curve intersections (for both straight and arc-shaped curves) are available
for snapping and displayed with a "+" sign.
Face selection does not override edge extension snapping. In this example, the
extension line is above the face. If the face had a higher priority, you could
not snap to the extension line without reorienting the view.
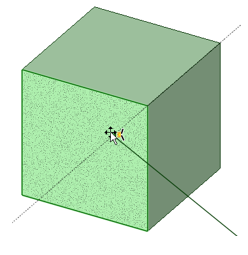
You can snap a vertex to a 3D point.
You can also snap a vertex to the virtual intersections of extended solid
edges.