
- Mechanical APDL Function
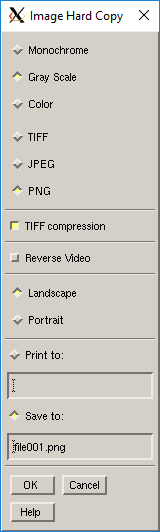
Prints a hard copy of a captured image. You can write the image to a graphics file or send it directly to the printer.
- Plot Type
Specifies the graphics type for your printer. Most laser printers are designed to print black and white (monochrome) or gray scale graphics.
- File Type
TIFF: Creates TIFF file (should not be spooled to a printer)
JPEG: Creates a .jpg file
PNG: Creates a .png file
- TIFF Compression Toggle
Compresses TIFF files (default = ON).
- Reverse Video Toggle
Switches the color black to the color white on hard copies. By default, Reverse Video is on, which means that what you see in white on your screen will be printed in black on your hard copy.
- Orientation
Specifies how graphics are oriented on hard copies. The default orientation is Landscape, which means that the width dimension of the captured image will correspond to the height dimension of your printed page.
- Print to:
Sends the graphics directly to a printer. Then, in the corresponding text entry box, fill out the system level print command (for instance, lpr on Linux) that you use to send PostScript format files to PostScript printers.
- Save to:
Writes the captured image to a file. By default, your graphics are written to a file with the name shown in the text entry box. You can change the file name to something that more closely describes your project, but you should keep the default extension. When you use the button repeatedly, automatic indexing is used for the file name. For example, if you name your first file Shuttle.png and then pick , the file name is automatically changed to Shuttle000.png. The next file produced using the button will automatically be indexed to Shuttle001.png, and so forth.