


Simplify and focus your workflow using the Sintering Process Wizard. Step through the wizard pages that are organized into workflow tasks. Actions take place when you click Next at the bottom of each page. As you progress through the steps, the wizard automatically adds objects into the project tree. Exit the wizard at any time and continue setting up your simulation manually in the project tree.
Open the Wizard
First make sure the Sintering Process Add-on is loaded.
To start the wizard, select the Sintering Process tab and then select the Open Wizard button.
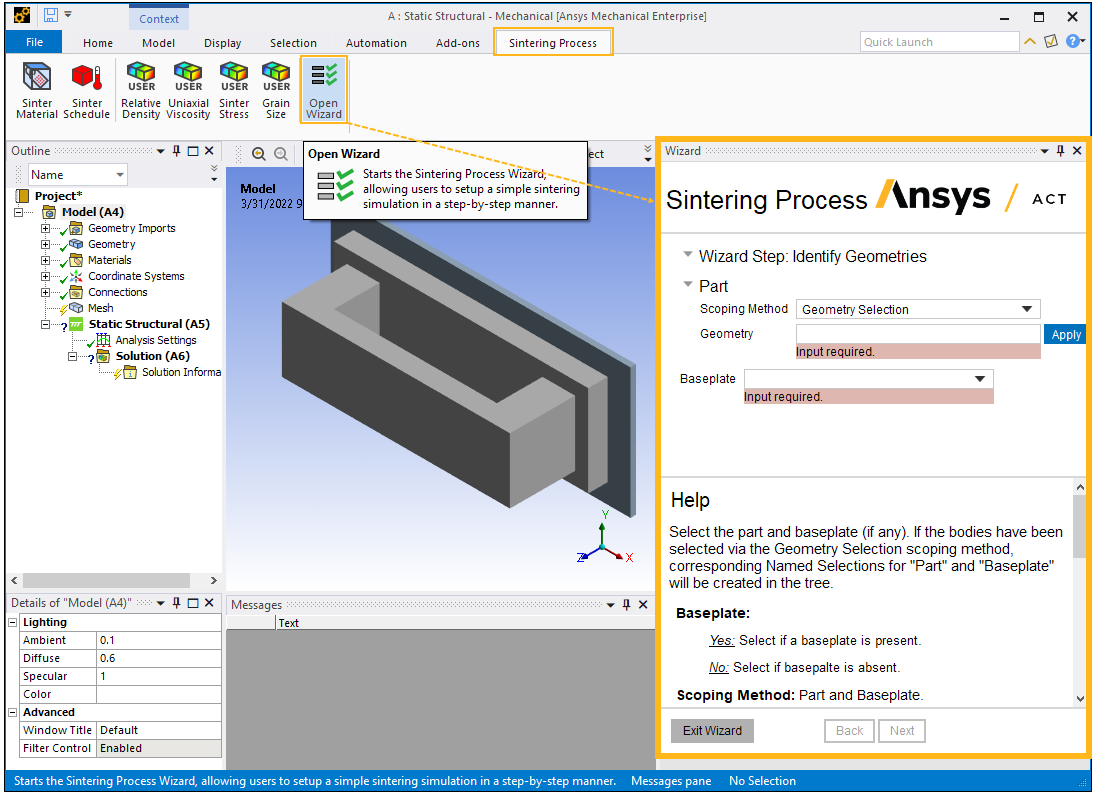
The wizard guides you in a step-by-step manner through the following steps:
Identify Geometries
Define Contact
Define Constraints
Generate Mesh
Define Gravity
Define Sinter Material
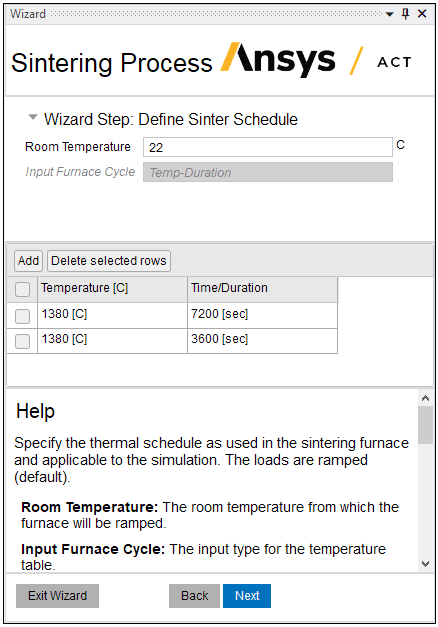
Define Sinter Schedule
Define Results and Solver Settings
Refer to the in-wizard help at the bottom of each page. An example page, Define Sinter Schedule, is shown here:
Close the Wizard
Upon completing the last page, click Finish to complete the wizard.
Click the X in the upper, right corner to close the wizard window.
The simulation is now in a solvable state.
Review Items in Project Tree
It is a good idea to review the objects in the project tree that were created by the Sintering Process Wizard. Select the objects in the tree from top to bottom and review the details pane for each object to see how the options you specified in the wizard are implemented in the project tree. Notice that new objects, such as Sintering Material and Sintering Schedule have been added. You can make changes or add items as needed.
Note that the use of the wizard to specify the sintering thermal cycle avoids the need to manually change the end time of load steps in the Analysis Settings object in the project tree. Each ramp/isothermal hold/cool down is automatically adjusted as a load step.