


Use the following workflow when you will be simulating the additive process in Mechanical.
Open or create your part in SpaceClaim. Do this without going through Ansys Workbench.
Use Additive Prep to orient your part and generate supports.
Most people will choose to use a layered tetrahedral mesh method for their part once in Mechanical but if you plan to use a Cartesian mesh, set intrusion parameters to zero when generating supports.
Suppress parts not intended for simulation.
If you have multiple workspaces in the Build Volume, right-click and select Suppress for Physics on the workspaces you will not be transferring to Workbench for simulation.
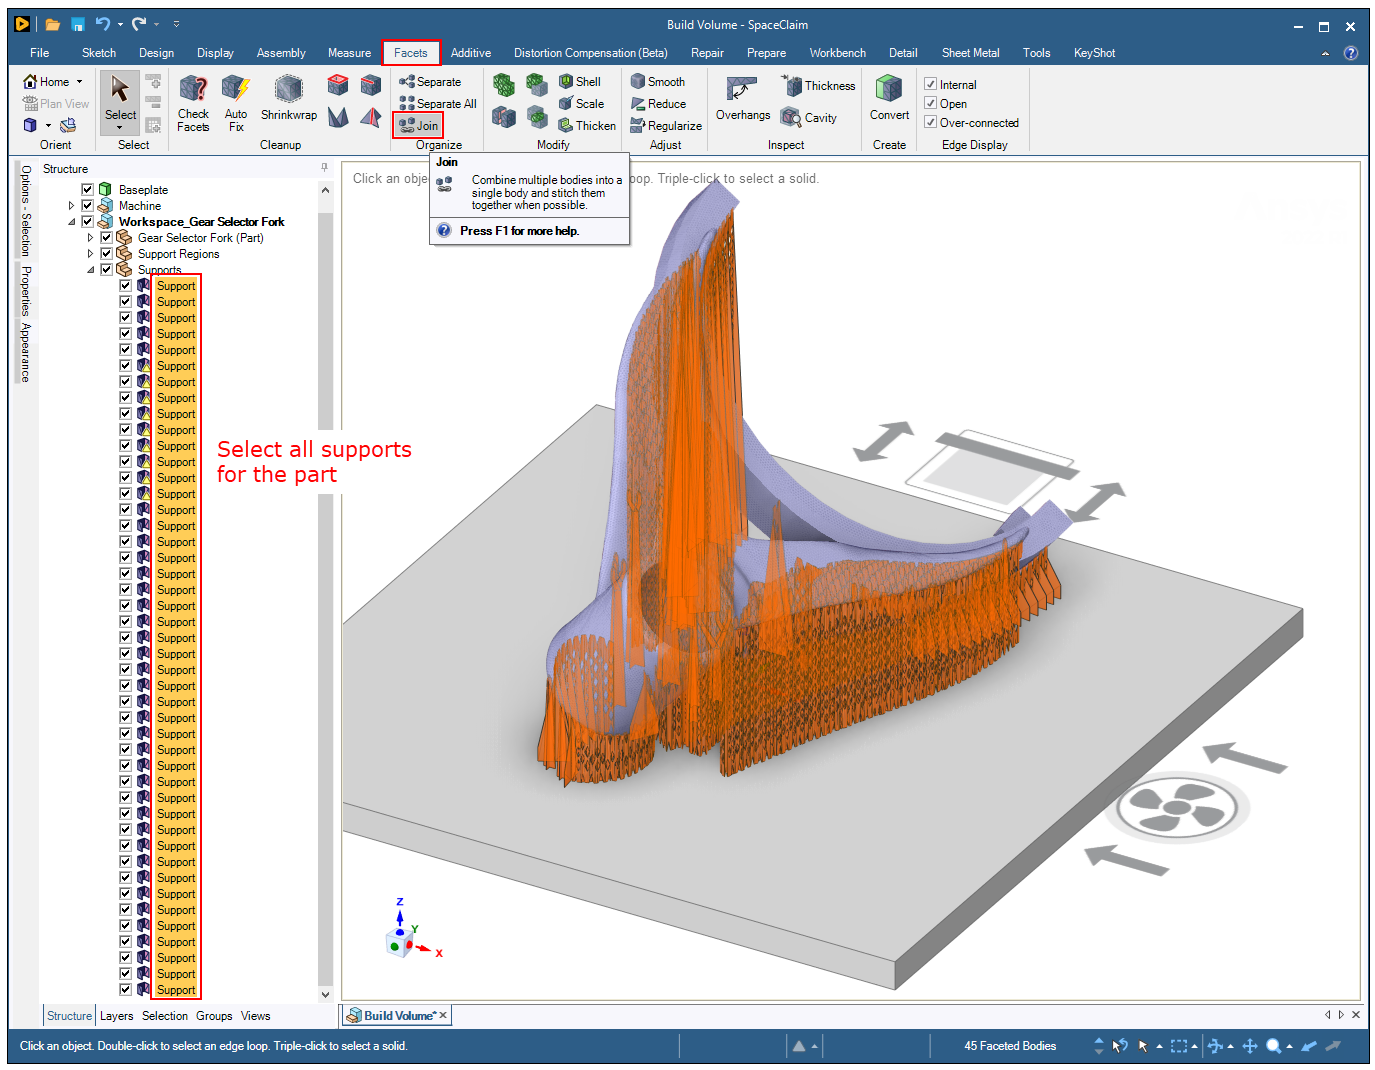
Join the supports together into one support entity. Do this for each part you want to transfer to Workbench such that you have one support entity per part.
Select all the supports (select, shift select) associated with a part. Click the Facets tab in the ribbon and then click Join (in the Organize group). Do the same for each part to be transferred to Workbench for simulation.
By doing this step, you will avoid bringing all the supports into the Mechanical application as individual stl supports.
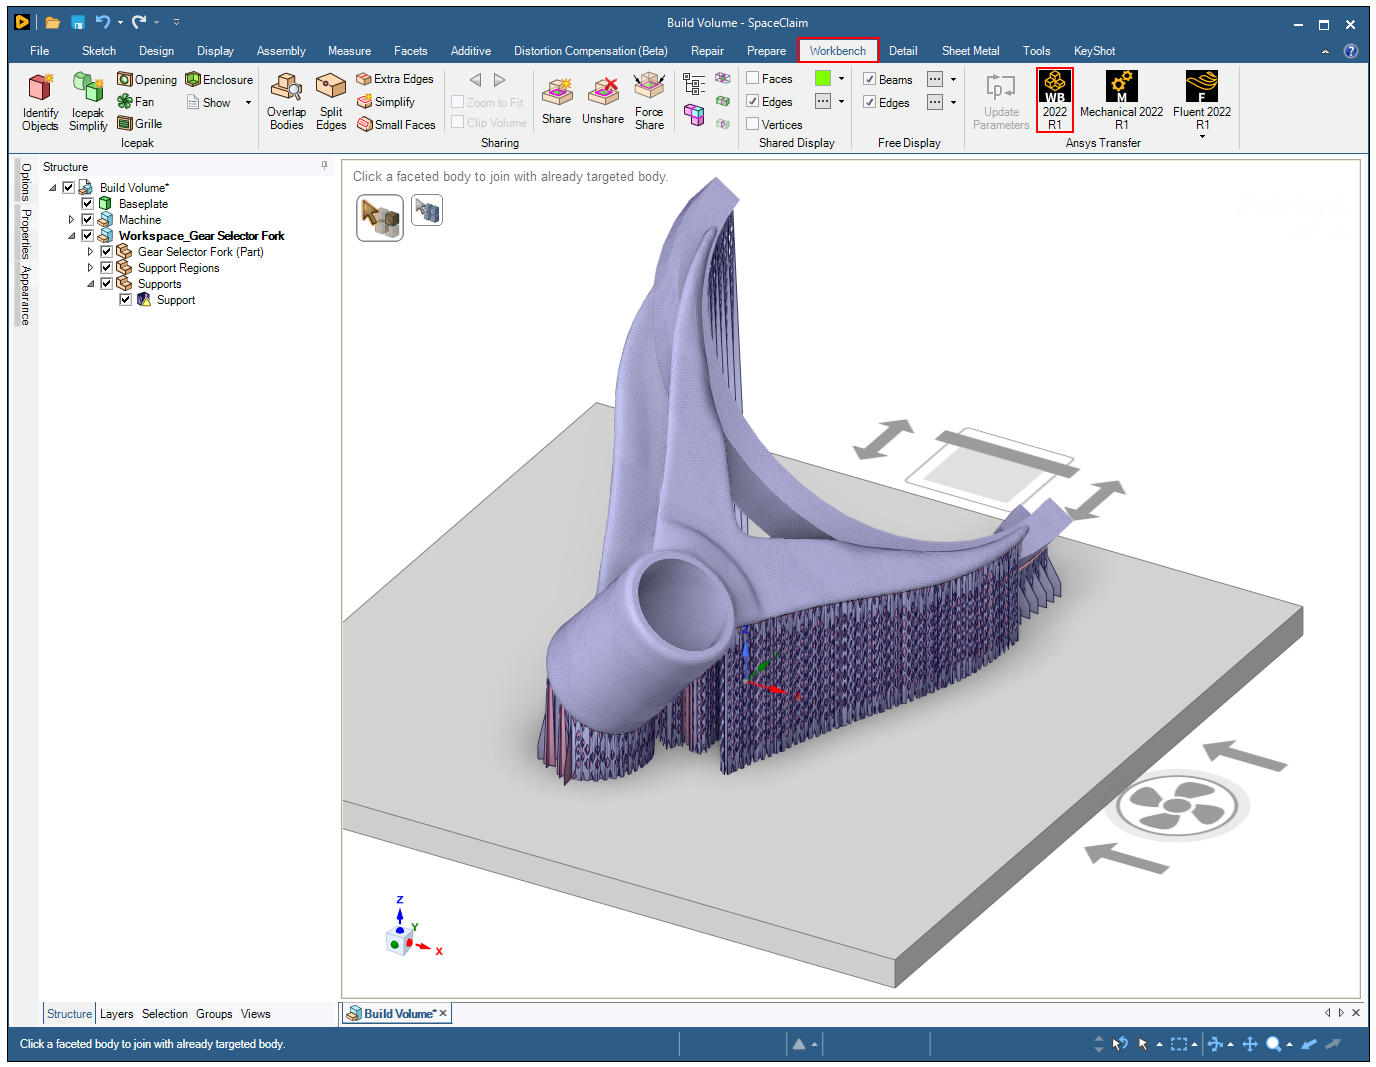
Transfer data to Ansys Workbench.
Select the Workspace. Click the Workbench tab and then the Workbench button under Ansys Transfer in the ribbon. You will be prompted to save the SpaceClaim document if you haven't already done so. When Workbench opens you will see the Mechanical Model system containing the assembly geometries.
Create the analysis system.
In Workbench, scroll down to Custom Systems and add (by double-clicking) either the AM Inherent Strain or the AM Thermal-Structural system.
Drag the Geometry cell of the Mechanical Model onto the Geometry cell of the AM system. Your systems should look like one of the systems shown in the following figure.

Double-click the Model cell in the AM system to bring up Ansys Mechanical. When Mechanical opens, you will see one STL Support object per part under the AM Process object. Proceed with the AM Process Simulation as usual.
Once you've transferred data to Workbench using Ansys Transfer, the systems are tied together such that if you close out of the Workbench application, the SpaceClaim application instance associated with that Build Volume will close as well.
Known Issues
If you do not join the supports together into one entity for each part, they will be imported into the Mechanical application as many individual stl supports and it may be unmanageable to continue on for simulation. This is true regardless of whether you use the Ansys Transfer buttons (Workbench or Mechanical) when opening Mechanical or launching Mechanical directly.
In certain configuration scenarios, and for some .scdoc geometries that were created prior to Release 2021 R2, if you have the Additive Prep license enabled in SpaceClaim you will not be able to open the Mechanical Application from inside Ansys Workbench. Mechanical will begin to launch and then it gets stuck at this stage. If this happens, the workaround is to do one of the following:
Within SpaceClaim 2021 R2 or a subsequent release, save the older .scdoc geometry as a new file using Save, Save As, or Export from Additive Prep.
Clear the Additive Prep license check box in SpaceClaim, perform your work in Mechanical, and then go back into SpaceClaim to enable Additive Prep for your next session. Additive Prep license options are accessible in SpaceClaim by clicking File > SpaceClaim Options > License and then checking/unchecking Additive Prep.