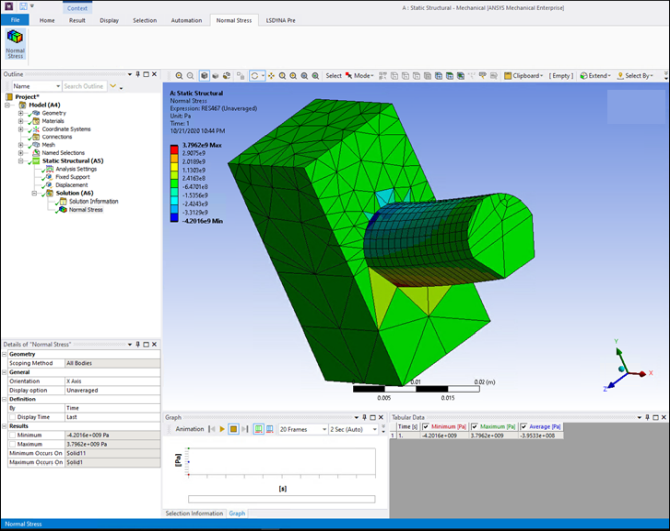
The supplied extension Stresses can be used
to calculate normal stresses, both unaveraged and averaged, for a given system. This
extension is meant to demonstrate the capability of custom results. Because normal
stress is a result that is already available through Mechanical, you can validate the
result from this custom extension against the Mechanical result.
The file Stresses.xml follows.
<extension version="1" name="Stress Postprocessing">
    <guid shortid="Stresses">a1844c3c-b65c-444c-a5ad-13215a9f0413</guid>
    <script src="stress_res.py" />

    <interface context="Mechanical">
        <images>images</images>
        <toolbar name="Normal Stress" caption="Normal Stress">
            <entry name="Normal Stress" icon="result">
                <callbacks>
                    <onclick>CreateNormalStressResult</onclick>
                </callbacks>
            </entry>
        </toolbar>
    </interface>

    <simdata context="Mechanical">
        <result name="Normal Stress" version="1" caption="Normal Stress" unit="Stress" icon="result" location="elemnode" type="scalar">
            <callbacks>
                <evaluate>EvaluateNormalStress</evaluate>
            </callbacks>
            <property name="Geometry" caption="Geometry" control="scoping"></property>
            <property name="Orientation" caption="Orientation" control="select" default="X Axis">
                <attributes options="X Axis,Y Axis,Z Axis"></attributes>
            </property>
            <property name="DisplayOption" caption="Display option" control="select" default="Unaveraged">
                <attributes options="Unaveraged,Averaged"></attributes>
                <callbacks>
                    <onvalidate>ChangeDisplayOption</onvalidate>
                </callbacks>
            </property>
        </result>
    </simdata>
</extension>
The various blocks within this file are as follows:
<interface>...</interface>Denotes a new interface being added to Mechanical.
<toolbar>...</toolbar>Adds a new toolbar to the Mechanical ribbon.
<entry>...</entry>Adds a new button in the toolbar.
<callbacks>...</callbacks>Denotes the function to call when the toolbar button is clicked.
<simdata>...</simdata>Encapsulates the information needed for the custom result.
<result>...</result>Encapsulates the details of the custom result, such as the name, unit, type, location, and so on. The type can be set to scalar or vector. The location can be set to node, element or elemnodal.
<property>...</property >Adds a custom property to the custom result. The control and attributes can be used to specify details about the property, such as type, dropdown entries, and so on.
<evaluate>...</evaluate >Denotes the function to call when the custom result is evaluated.
The IronPython script stress_res.py for
this extension follows.
import units
import math

# Custom Result Object Creation
def CreateNormalStressResult(analysis):
    analysis.CreateResultObject("Normal Stress", ExtAPI.ExtensionManager.CurrentExtension)

# Change averaging option
def ChangeDisplayOption(result,prop):
    displayOpt = result.Properties["DisplayOption"].Value
    if displayOpt == "Unaveraged":
        result.ResultAveraging = ResultAveragingEnum.Unaverage
    elif displayOpt == "Averaged":
        result.ResultAveraging = ResultAveragingEnum.Average

# Custom Result Object Evaluation
def EvaluateNormalStress(result,stepInfo,collector):
    '''Evaluates Normal Stress as a custom result, with different averaging options.'''

    # Reader initialization
    reader = result.Analysis.GetResultsData()
    reader.CurrentResultSet = stepInfo.Set

    # Get the requested orientation
    orientation = ""
    orientation_prop = result.Properties["Orientation"].Value
    if orientation_prop == "X Axis":
        orientation = "X"
    elif orientation_prop == "Y Axis":
        orientation = "Y"
    elif orientation_prop == "Z Axis":
        orientation = "Z"

    # Get the stress result from the reader
    stress = reader.GetResult("S")
    stress.SelectComponents([orientation])

    # Get the unit conversion factor
    result_unit = stress.GetComponentInfo(orientation).Unit
    conv_factor = units.ConvertUnit(1., result_unit, "Pa", "Stress")

    # Calculate and plot result
    for elem_id in collector.Ids:
        elem_vals = stress.GetElementValues(elem_id)

        values=[]
        # Use unit conversion factor
        for value in elem_vals:
            values.append(value*conv_factor)

        # set values to collector
        collector.SetValues(elem_id, values)
This script defines all of the callback functions that are invoked in the previous XML file:
CreateNormalStressResultThis function creates a custom result object in the Mechanical tree.
ChangeDisplayOptionThis function toggles the display options of the custom result object.
EvaluateNormalStressThis function evaluates and displays the normal stresses.
Using the Result Reader interface, you can retrieve results for the calculated normal stresses. The reader is initialized as follows:
reader = result.Analysis.GetResultsData()
Once the reader is initialized, you can extract specific results from the reader as follows:
stress = reader.GetResult(“S”)
elemVals = stress.GetElementValues(elem_id)  #or GetNodeValues(node_id) for nodal results
After retrieving the nodal or element result values, you can perform any necessary postprocessing on these results. After postprocessing, you can use the Result Collector interface to store the results in Mechanical. You use the result collector as follows:
collector.IdsReturns the node or element IDs that the custom results are requested for based on your chosen scoping.
collector.SetValues(id, val)Stores the custom result value for this node or element ID.
Once custom result values are stored in the Result
Collector, the requested contours are automatically computed and
displayed when the callback <evaluate> is
executed.