


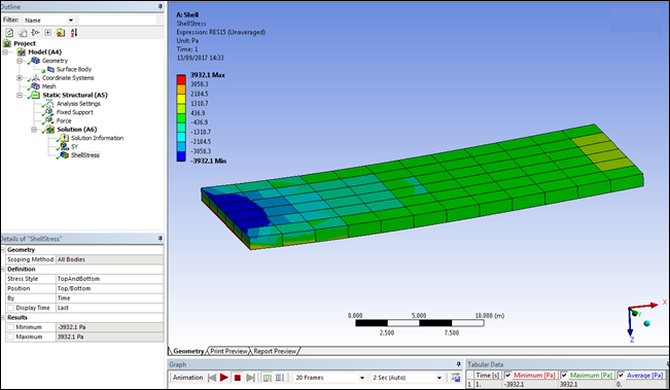
On a shell element in the Mechanical tree, you can create an ACT result object to access the stress in a specified direction and display it as a custom result.
The following XML file adds a toolbar with a single button for creating a custom stress result on a shell element. The custom stress result is in the Y direction.
<extension version="1" minorversion="0" name="ACTResult">

   <author>Ansys Inc.</author>
   <description>ACT shell result</description>
   <guid shortid="ACTResults">****</guid>
   <script src="main.py" />

   <interface context="Mechanical">
     <images>images</images>
     <toolbar name="ACTResults" caption="ACTResults">
       <entry name="ShellStress" icon="shellActRes">
         <callbacks>
           <onclick>CreateShellStress</onclick>
         </callbacks>
       </entry>
     </toolbar>
   </interface>

   <simdata context="Mechanical">
     <result name="ShellStress" version="1" caption="ShellStress" unit="Stress" icon="result"
             location="elemnode" type="scalar" class="ActResController">
       <property name="Geometry" caption="Geometry" control="scoping"></property>
       <property name="StressStyle" caption="Stress Style" control="select" default="TopAndBottom">
          <attributes options="Top/Bottom,Top,Bottom,Membrane,Bending"></attributes>
       </property>
       <property name="Position" caption="Position" control="select" default="Top/Bottom">
         <attributes options="Top/Bottom,Top,Middle,Bottom"></attributes>
       </property>
       <callbacks>
         <evaluate>EvaluateShell</evaluate>
       </callbacks>
     </result>
   </simdata>

 </extension>
In this file, the element <script> references the
IronPython script main.py. The element
<interface> defines the toolbar and a button.
In the child element <callbacks>, the single
callback <onclick> invokes the function
CreateShellStress, which creates and adds the result
to the simulation environment.
The element <simdata> defines the result.
The attributes in the child element
<result>provide the name, version, caption, unit, and icon that apply to the result. These properties display in the Details view of Mechanical when the result is selected in the Outline view. The Details view shows each property with the corresponding names and result values.In the child element
<callbacks>, the single callback<evaluate>invokes the functionEvaluateShellwhen Mechanical requests an evaluation. The output of this function is sent directly to Mechanical, which displays the result.
The IronPython script main.py follows. This sample code
shows how to create the result object, calculate the result, and set up the
result reader. For more information on the result reader, see Retrieving Mechanical Results More Efficiently.
def CreateShellStress(analysis):
    analysis.CreateResultObject("ShellStress")

def EvaluateShell(result, stepInfo, collector):
    result.Controller.EvaluateShell(result, stepInfo, collector)

class ActResController:

    def __init__(self, api, result):
        pass

    def EvaluateShell(self, result, stepInfo, collector):
        # create a result reader
        reader = result.Analysis.GetResultsData()

        # get the LayeredSolidStressStyle
        stressStyle_value = result.Properties["StressStyle"].Value
        stress_style = self.stressStyle(stressStyle_value)
        reader.LayeredSolidStressStyle = stress_style

        # get the shell position
        position_value = result.Properties["Position"].Value
        shell_position = self.position(position_value)

        # set up the reader
        reader.ShellPosition = shell_position

        reader.CurrentResultSet = stepInfo.Set
        stress_result = reader.GetResult("S")
        stress_result.SelectComponents(["Y"])

        for id in collector.Ids:
           values = stress_result.GetElementValues(id)
           collector.SetValues(id, values)

    def stressStyle(self,argument):
        switcher = {
            "Top":StressStyle.Top,
            "Bottom":StressStyle.Bottom,
            "TopAndBottom":StressStyle.TopAndBottom,
            "Membrane":StressStyle.Membrane,
            "Bending":StressStyle.Bending
            }
        return switcher.get(argument, StressStyle.TopAndBottom)

    def position(self,argument):
        """equivalent to a switch/case"""
        switcher = {
            "Top":ShellPosition.Top,
            "Bottom":ShellPosition.Bottom,
            "Middle":ShellPosition.Middle,
            "Top/Bottom":ShellPosition.TopAndBottom
            }
        return switcher.get(argument, "Top/Bottom")