


Excel Plug-In Features
The Excel Plug-In's capabilities are divided into two groups:
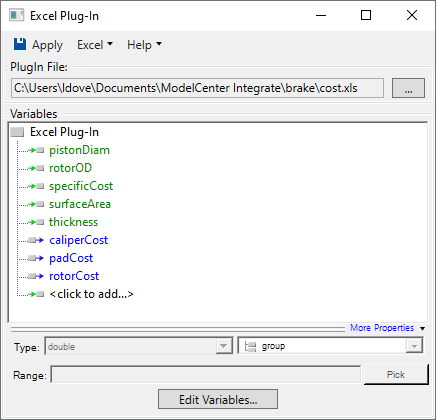
Mapping Excel Ranges to ModelCenter Variables

Variables are created in the Excel Plug-In by clicking on the <click to add variable> text. Clicking this area will prompt you to enter variable information.

Upon creating a variable, property fields will be enabled.
Variable Properties
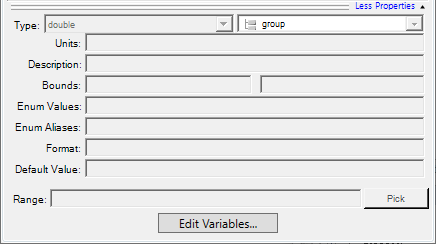
Properties for each variable can be customized. Note that some properties, such as lower and upper bounds, are only available depending on the type of variable currently selected. Property values are optional with the exception of the Range value which must be specified for each variable.
- Type - Both the type and state may be specified for a variable. Generally speaking, these values do not need to be manually set as the plug-in will automatically determine values when a range is selected. The variable type is determined based on the contents of the range, i.e, numeric or string. The variable state is determined based on the source for the range, i.e., if a range contains a formula, then the variable will be stored as an output.
- Units - Units for the variable.
- Description - Short description of the variable.
- Lower Bound - Numeric lower bound value.
- Upper Bound - Numeric upper bound value.
- Enum Values - A comma separated list of acceptible values.
- Enum Aliases - A comma separate list of strings that can be used in place of the enum values. The number of enum aliases, if specified, must be equal to the number of enum values.
- Format - The format ModelCenter should use to display the variable.
- Range - The Excel range that the variable is mapped to. To help select the range, the Pick button will show Excel and prompt you to choose a range.
Editing Variables Textually
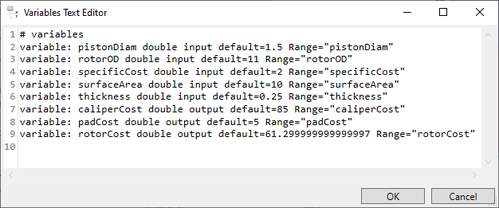
To edit the variables in a text view, press the Edit Variable... button. This will launch the Variables Text Editor dialog which can be used to quickly edit a set of variables.
Named Ranges
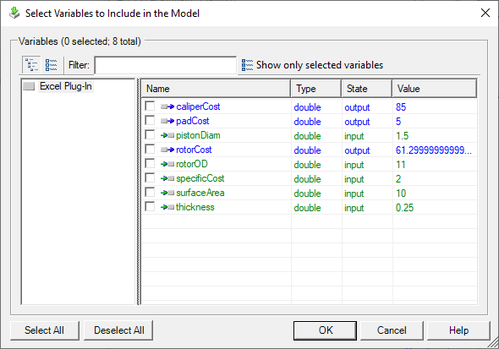
If you have specified names for ranges in your Workbook, you can import these names and automatically create variables for them by pressing the Import Named Ranges... button from the Excel pull-down menu. This feature will display a list of all names found in Excel and allow you to select which variables should be automatically mapped to ModelCenter variables. Note that the Import Named Ranges dialog will automatically be launched when an Excel Workbook is first specified if the Workbook contains one or more named ranges.
Managing the Excel Session
The Excel Plug-In Options dialog allows you to customize the behavior of your Plug-In.
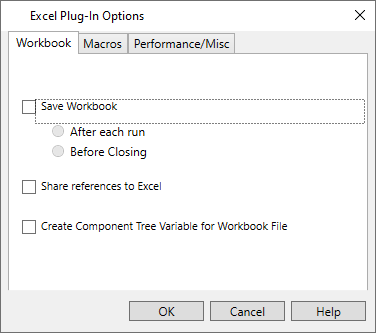
Workbook Tab
-
Save Workbook -- Causes the Workbook to be saved at specific times.
- After each run - The Workbook is saved after each time that the Component executes.
- Before closing - The Workbook is saved when the Model is closed.
- Share references to Excel -- If selected, multiple components in a model using the same Excel file can use the same instance of Excel.
- Create Component Tree Variable for Workbook File -- If selected, the path to the Excel file will be shown in the ModelCenter Component Tree.
Macro Options
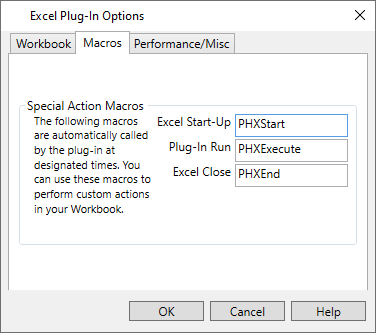
The plug-in can call macros at special times to allow you to perform custom actions. This is normally associated with Workbooks that require the user to press a "run" button to cause the Workbook to update. By default, the macros are called PHXStart, PHXExecute, and PHXEnd. These names may be modified if desired.
Performance/Misc. Options

- Allow ModelCenter arrays to be smaller than the Excel range -- If checked, this option allows dynamic array sizes up to the size of the Excel range.
- Suspend Excel calculations while sending values to Excel -- If checked, Excel's auto calculation feature is suspended until all input values have been sent to Excel. This speeds up the plug-in as Excel only has to recalculate onceper execution of the plug-in.
- Load Solver add-in at start-up -- If checked, the Solver add-in will be explicitly loaded when your Workbook is loaded. By default Excel does not do this if it is started as a background, hidden application. Generally this option should always be checked.
- Create a new Excel instance each time this component is run -- If checked, the Excel sheet will run in another instance of Excel.exe that starts when the component runs, and stops when it completes. This option helps reduce the total resources required to run a model since Excel instances are only active while needed, but adds an additional processor cost of continually starting and stopping Excel. This option should be considered when running a model with a large number of Excel components to reduce the number of concurrently active processes.