Following initial Granta MI installation and setup, you must change a number of
configuration settings to enable Granta MI applications and services to communicate with
each other via your load balancer.
Prerequisites: This requires both a configured load balancer and an existing Granta MI
installation, with a working MI Settings Service.
-
Open the One MI web application located on your MI application server and then
open MI Settings.
-
Go to the Integration Settings page.
-
Edit the following URLs to specify the hostname of your load balancer instead
of the MI application server hostname:
- One MI client access URL
(
Default.OneMi.ExternalAddress)
- MI Data Flow client access URL
(
Default.Workflow.ExternalAddress)
- MI Material Calibration client access URL
(
Default.MaterialCalibration.ExternalAddress)
- MI Viewer client access URL
(
Default.Viewer.ExternalAddress)
- MI User Manager client access URL
(
Default.UserManager.ExternalAddress)
- MI Machine Learning client access URL
(
Default.MachineLearning.ExternalAddress)
-
Add your load balancer hostname and Fully Qualified Domain Name to the
comma-separated list of allowed One MI hostnames:
-
On the Settings home page, click to open the One MI settings
page.
-
Edit the One MI application server alternative machine
names field (
Allowed.OneMi.HostNames) to
add the load balancer hostname and FQDN to the comma-separated list of
hostnames. For example, if your load balancer host name is
my-loadbalancer, you would add the following:
my-loadbalancer,my-loadbalancer.example.com
-
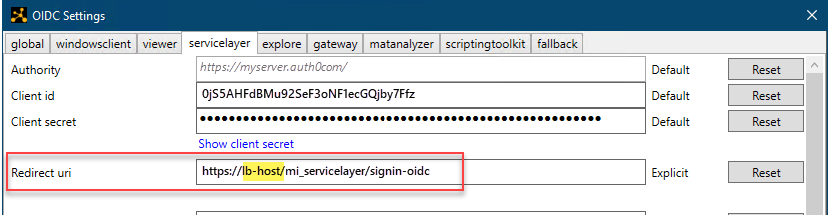
OIDC authentication only: modify all redirect URLs in OIDC
Settings to point to your load balancer instead of to a specific
node.
-
Open the MI Server Connection tool.
-
Go to System Security Settings, click Configure OIDC
settings, then click Edit OIDC
settings.
-
One each tab, modify the Redirect uri field to
replace the MI node name with your load balancer hostname. For
example: