
Assigning Parameters to Component Quantities
Use the Parameter Selection dialog box to assign design parameters to component input quantities. You can only parameterize input quantities that do not show a pin. Select Twin Builder > Parameter Selection Dialog, or in the Project Manager pane, right-click a design or subsheet and select Parameter Selection Dialog. The Parameter Selection dialog box appears as pictured below.
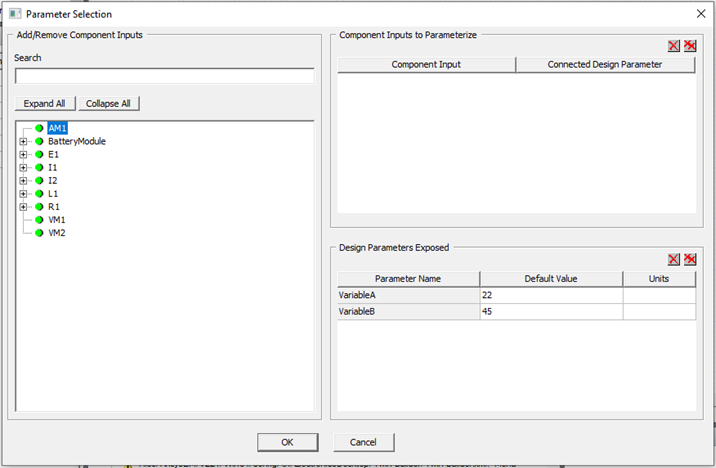
The Parameter Selection dialog box has three panels.
- Add/Remove Component Inputs – Select the component quantity to parameterize. Select a component quantity from the tree to add it to the Component Inputs to Parameterize panel. Use the Search box to search for quantities in the tree.
- Component Inputs to Parameterize – Assign a parameter to a component quantity. The Component Input column contains the quantity name and the Connected Design Parameter column contains the parameter name. When adding a quantity to the grid for the first time, a new parameter is created and added to the Design Parameter Exposed panel. Edit the text in the Connected Design Parameter column to rename a newly-created parameter. Edit the text in the Connected Design Parameter column to assign an existing parameter to a quantity. To delete a quantity assignment, select its row and click
 . Click
  to delete all assignments.
 - Design Parameters Exposed – Assign values to existing and new parameters. In this panel, the Parameter Name column displays the parameter name, the Default Value column displays the parameter value, and the Units column contains the value units. Edit the text in the Default Value column to change the parameter value; use the drop-down list in the Units column to change the units. To delete a parameter, select its row and click . Click to delete all parameters.
Click OK to implement your changes and close the dialog box; click Cancel to close the dialog box without making any changes.