
HPC Scheduler Known Issues and Workaround
Windows HPC Pack 2019 Update 2 NodeSorter
The AEDT integration with Windows HPC Pack 2019 Update 2, has seen Microsoft MPI use cases failing with rank 0 hf3d crash. In this case, Windows HPC launches desktop and HFSSCOMENGINE processes on different compute nodes, eventually, MPI rank 0 does not start on the same machine as the HFSSCOMENGINE process. Since MPI rank 0 is not on the same compute node as HFSSCOMENGINE, it fails to read the correct mpiHostfile.txt under temp directory causing hf3d to crash. This host re-ordering is happening due to a change in WinHPC behavior in 2019 Update 2.
Workaround:
To resolve this issue, we are using a NodeSorter DLL that overrides the Windows HPC Pack 2019 Update 2 node sorter behavior to use a custom node sorter, which sorts the available nodes during task allocation in alphabetical order. You need to deploy this custom node sorter DLL (NodeSorter.dll) and configure Windows HPC to use the new job template.
The cluster administrator must follow given steps:
- Deploy the NodeSorter.dll
- Copy NodeSorter.dll located at <AnsysEM Installation>/Win64/schedulers/WinHPC/ to %CCP_DATA%NodeSorters folder on the head node of the Windows HPC cluster. You may need to create this folder manually.
- Rename the DLL to 0.dll (assuming there are no other node sorter dlls in %CCP_DATA%NodeSorters folder to avoid overwriting existing DLLs). Using other node sorter might not work.
Note: Windows HPC supports up to a maximum of 64 custom node sorters.
-
Create Windows HPC Job template
- Open the “HPC Cluster Manager” application
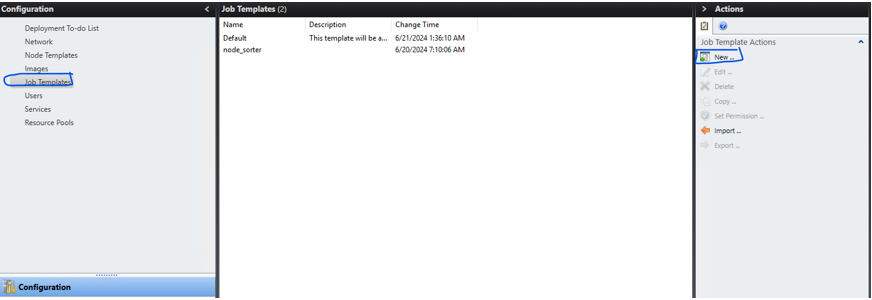
- Go to “Job Templates” tab and then press “New …” on the right:
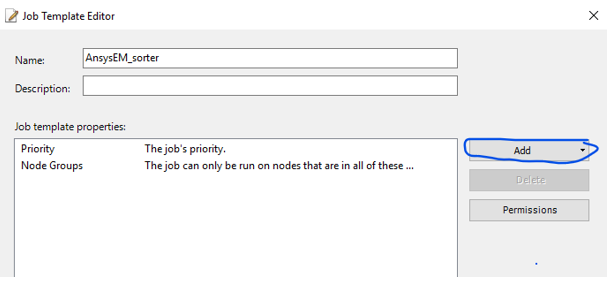
- Give the node sorter a name (e.g.: AnsysEM_template) and press Next multiple times up to get to the “Job Template Editor” window, then press Add.
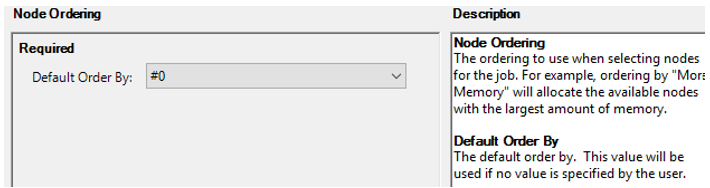
- Add a “Node Ordering” property, where “Default Order By:” attribute has a value relevant to the name of the Node sorter dll, for example if NodeSorter dll has a name of 0.dll then “Default Order By:” should be #0, e.g.:
- Then save the changes by pressing Save to all the open dialogs.
- Open the “HPC Cluster Manager” application
Note: Due to a bug in the HPC Cluster manager, its GUI may not show the value of the above property correctly. To confirm that the “Node Ordering” property value has been set correctly, you can export the template as an XML file and then locate the line with the value of OrderBy property. That line should look like this:
<TemplateItem PropertyName="OrderBy" Default="#0" />
- Using the job template for AnsysEM jobs
Login on to a Windows machine that has the desired version of AnsysEDT. Ensure that the user can use the needed AnsysEM licenses.
Select Windows HPC as scheduler
Start AnsysEDT and then using Select scheduler dialog, ensure that Windows HPC is selected as the scheduler. You may need to restart AnsysEDT after any Windows HPC scheduler’s configuration changes such as adding a new job template. See AnsysEDT online help for more information.
-
Select the job template
In the Submit Job dialog, change the tab to Compute Resources tab, then click on the “Resource selection” button. In the resource selection attributes, enable the JobTemplate parameter and select the just created Job template:
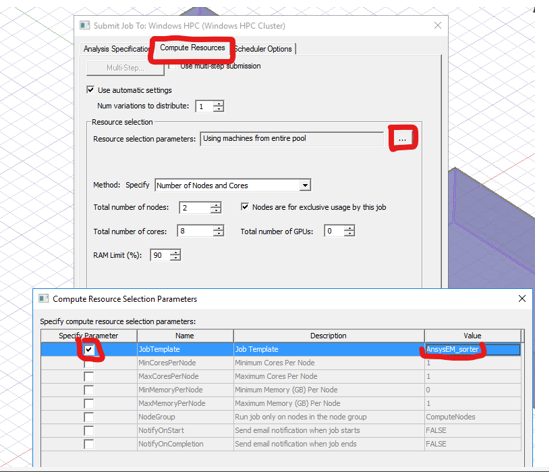
Press OK to apply the changes when the job is submitted. See AnsysEDT online help for more information.