
Displaying and Saving Charged Particle Animations
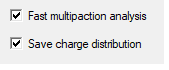
In order to display a charge particle animation, you have to select Save charge distribution in the Multipaction Analysis Setup dialog box.
Once the multipaction simulation is finished, you can right-click Field Overlays and select Plot Particles....
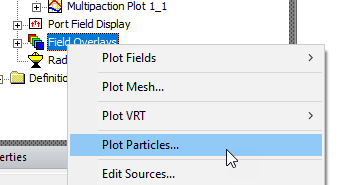
This opens the Create Particles Plot dialog.
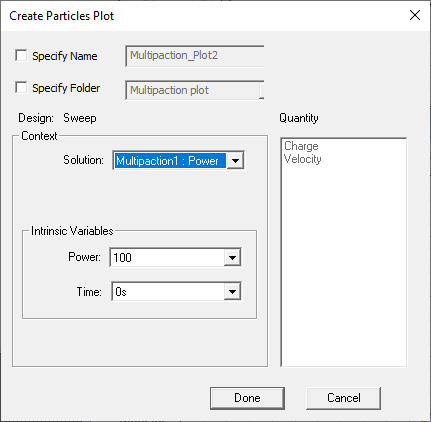
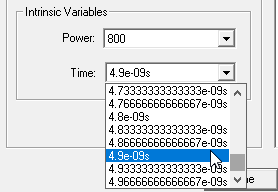
When there are multiple multipaction setups and power multipliers, the dialog allows you to select specific Solution and Power to plot the charged particle distribution and animation.
Click Done to cause a Particle plot to appear in the Modeler window.
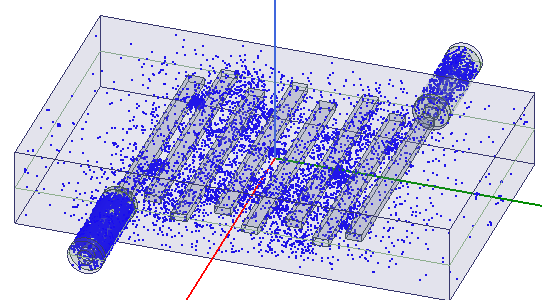
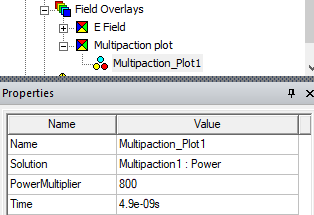
The properties of the particle plot are shown in the Properties window.
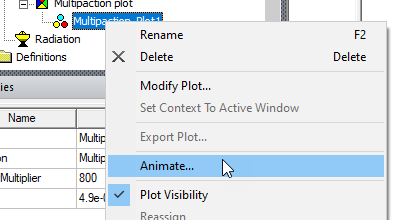
Once you have generated the Multipaction Plot in the Field Overlays, you can create an animation of the movement of the charged particles. Right-click the Multipaction Plot and select Animate... from the shortcut menu.
If you have previously created an animation for the plot, the Select Animation dialog box will open. You can select an animation to view, Edit, or Delete, or select New... to open the Create Animation Setup dialog box. If you have not previously created an animation, the Create Animation Setup dialog opens automatically.
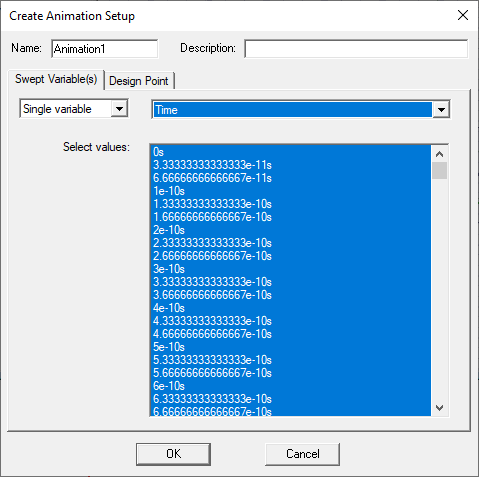
By default, the charge distribution for all time steps will be animated. The animation comes with a label showing the current time.

You can remove the label by unchecking Show in the Animation control panel.
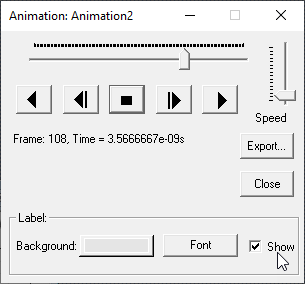
To save an animation file, click Export... and choose the path and file type of the animation.
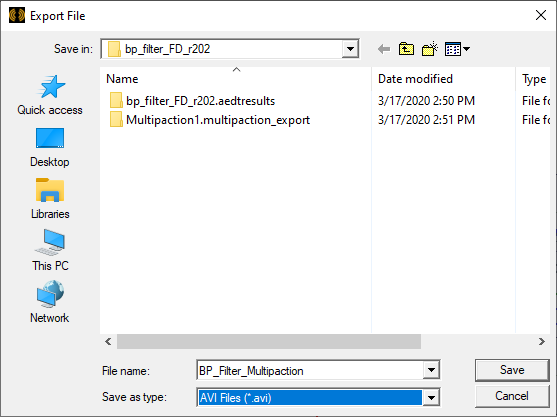
Files can be AVI Files (*.avi), Animated GIF (*.gif), or Web M Files (*.webm).