
Understanding Registry Tools
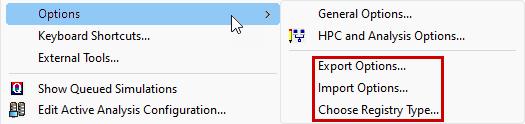
In the context of this topic, when we say "Registry" we are referring to the files where the various Ansys Electronics Desktop application options are stored. We are not referring to the Windows registry. Specifically, this topic discusses the Export Options, Import Options, and Choose Registry Type commands that are listed in the fly-out menu that appears when you click Tools > Options from the menu bar.
Choose Registry Type:
Click Choose Registry Type to switch between two available options. The following dialog box appears:
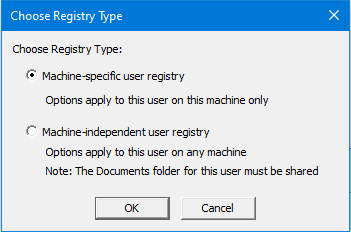
The choices are summarized as follows:
- Machine-specific user registry: This is the default type. You must set up the configuration manually for each user account on each machine where the Ansys Electronics Desktop software is run. You can do so by exporting and importing options (see below), setting the options in the user interface on each machine, or copying configuration files between machines and renaming them. The hostname of the computer is part of the filename for machine-specific registries.
- Machine-independent user registry: Allows you to share a single user configuration file among multiple machines. This choice has the advantage of keeping the options synchronized between all the user's machines.
The term "host" is frequently used to refer to any computer used to run a particular application. In the Ansys Electronics Desktop Help, the terms "host-specific" and "machine-specific" are used interchangeably, as are "host-independent" and "machine-independent."
When you switch registry types, the settings from the currently active registry are copied into the new registry, which then becomes the active one. The filenames for user registries are as follows:
- Machine-specific: <hostname>_user.xml
- Machine-independent: user.xml
For a machine-independent user registry to work, the Documents folder must be shared by all machines on which you run the software, and you must log into the same account on each machine. The user registry file is stored in the path, ...Documents\Ansoft\ElectronicsDesktop20yy.m, where yy is the last two digits of the version year, and m is the minor release number. The Documents folder must be mapped to a network folder accessible to all machines or to an online folder (such as OneDrive, for example). Otherwise, you would have to copy the registry file to each machine, and they would not remain synchronized, defeating the purpose of the machine-independent registry.
Exporting and Importing Options:
You can export options to an XML file, which can then be imported into the registry. This capability is useful if you want to use one set of options for a given situation and a different set for another. Simply export the options for each different configuration you use. Then, import the file that is applicable to your current work. You can also use this capability to transfer options to a different user or machine.
When you click Import Options, the following dialog box appears, in which you can navigate to the option file folder and select the desired file to import:
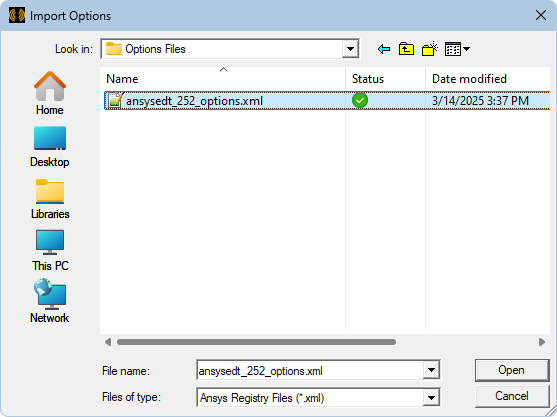
When you import an options file, the currently active registry type (specified using the Choose Registry Type command) determines to which registry file the options are written. After importing an options file, you will be prompted to restart the application, which is recommended.
When you click Export Options, the following dialog box appears, in which you navigate to the folder where you want to place the file and specify the filename:
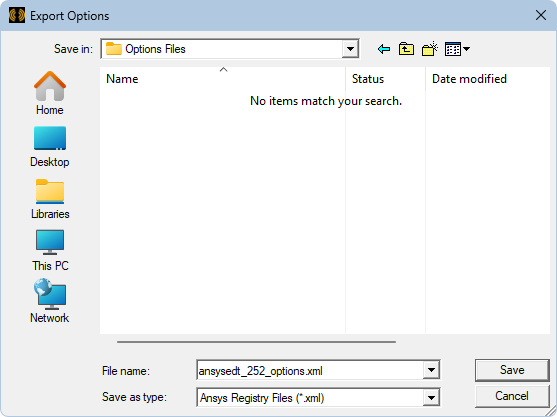
Options are always exported from the currently active registry. The usual precedence rules apply when getting the value to export. For example, if the current registry being exported is machine-specific, and a particular value is missing, the value in the machine-independent registry will be used (if available). See the Note at the bottom of Setting Options via Configuration Files for more information on the order of precedence.
An exported user options file contains only the settings that are exposed in the general options (that is, the Options dialog box) and view options (3D UI Options dialog box). So the exported file contains a subset of the configuration settings. HPC and other settings (such as window locations and window size data) are not included in the exported options.