
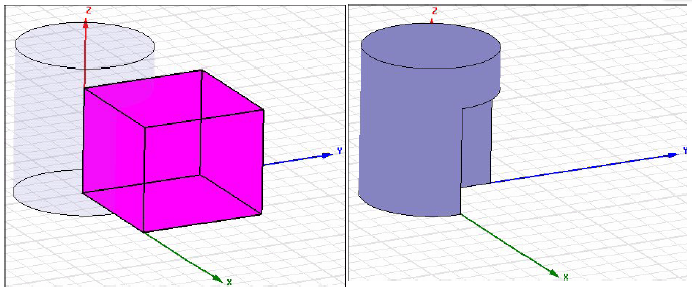
Subtracting Objects
- Select the object from which you want to subtract other objects.
- Hold down the Ctrl key and select the objects you want to subtract.
- Click Modeler > Boolean > Subtract
 .
.
- Optionally, select an object name in either list, and use the left and right arrow buttons to move the object name to the opposite list.
- Alternatively, type the name of object you want to subtract in the empty box below the Tool Parts list, and then type the name of the object from which you want to subtract it in the empty box below the Blank Parts list.
- Optionally, select Clone tool objects before subtract. This instructs Maxwell to always keep a copy of the original objects being subtracted.
- Click OK.
The Subtract dialog box appears.
Objects listed in the Tool Parts list are subtracted from the object or objects listed in the Blank Parts list.
The new object retains the name, color, and material of the first object selected.

Note: By default, the
objects being subtracted from the first object selected are not preserved for later use. If you want to keep a copy
of the objects being subtracted from the first object selected, do one
of the following:
- Copy the objects, and then paste them back into the design after subtracting them.
- Select Clone before subtract in the Modeler Options dialog box. This option instructs Maxwell to always keep a copy of the original objects being subtracted.