
Setting Icepak Options
To set Icepak options:
- Click Tools>Options>General Options to display
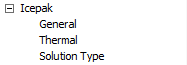
the Options dialog box. Select the Icepak entry in the hierarchical window, and press the + sign to show the choices
under Icepak.
- Under General options, select or clear the following check boxes:
- Auto create region
When this is checked, the global region, which represents the computational domain, is automatically created when an Icepak design is inserted into a project. The region's padding can be edited in the Properties window.
- Save before solving
- Apply variation deletions immediately
Checking this saves disk space.
- Save Optimetrics field solutions
Checking this uses more disk space.
- Allow import of inactive objects from Classic Icepak models (.tzr)
When this is checked, inactive objects defined in the Classic Icepak project are imported and placed in a separate design named with the suffix "_inactive."
- Under Thermal, select or clear the following check boxes and settings:
- Use Wizards for data input when creating new boundaries
When this is checked, the creation of boundaries and native 3D components uses a Wizard to guide you through the process. When this is not checked, the creation of boundaries and native 3D components displays a dialog with tabs for different kinds of information.
- Duplicate boundaries/mesh operations with geometry
When this is checked, you can duplicate a boundary or excitation when its geometry is pasted or duplicated. See Duplicating Boundaries and Excitations with Geometry.
- Visualize boundaries on geometry.
When this is checked, boundaries on geometries are displayed. Unchecking this turns off boundary visualization, and speeds up the display for complex models.
- Under Solution Type, you can set the default
solution type options when you initially insert a project.
- Temperature and Flow: for solving the energy equation for the temperature distribution together with the flow equations.
- Temperature Only: for solving the energy equation for the temperature distribution only.
- Flow Only: for solving the problem for flow only.